Fourth Day
Using Singularity
We recommend to use Singularity instead of Docker in a HPC environments. This can be done using the Nextflow parameter -with-singularity without changing the code.
Nextflow will take care of pulling, converting and storing the image for you. This will be done only once and then Nextflow will use the stored image for further executions.
Within an AWS main node both Docker and Singularity are available. While within the AWS batch system only Docker is available.
Let’s inspect the folder singularity:
ls singularity/
biocorecrg-c4lwg-2018-latest.img
This singularity image can be used to execute the code outside the pipeline exactly the same way as inside the pipeline.
Sometimes we can be interested in launching only a specific job, because it might failed or for making a test. For that, we can go to the corresponding temporary folder; for example, one of the fastQC temporary folders:
cd work/da/eb7564*/
Inspecting the .command.run file shows us this piece of code:
...

nxf_launch() {
    set +u; env - PATH="$PATH" SINGULARITYENV_TMP="$TMP" SINGULARITYENV_TMPDIR="$TMPDIR" singularity exec /home/ec2-user/git/CoursesCRG_Containers_Nextflow_May_2021/nextflow/test2/singularity/biocorecrg-c4lwg-2018-latest.img /bin/bash -c "cd $PWD; /bin/bash -ue /home/ec2-user/git/CoursesCRG_Containers_Nextflow_May_2021/nextflow/test2/work/da/eb756433aa0881d25b20afb5b1366e/.command.sh"
}
...
This means that Nextflow is running the code by using the singularity exec command.
Thus we can launch this command outside the pipeline (locally):
bash .command.run

Started analysis of B7_H3K4me1_s_chr19.fastq.gz
Approx 5% complete for B7_H3K4me1_s_chr19.fastq.gz
Approx 10% complete for B7_H3K4me1_s_chr19.fastq.gz
Approx 15% complete for B7_H3K4me1_s_chr19.fastq.gz
Approx 20% complete for B7_H3K4me1_s_chr19.fastq.gz
Approx 25% complete for B7_H3K4me1_s_chr19.fastq.gz
Approx 30% complete for B7_H3K4me1_s_chr19.fastq.gz
Approx 35% complete for B7_H3K4me1_s_chr19.fastq.gz
Approx 40% complete for B7_H3K4me1_s_chr19.fastq.gz
Approx 45% complete for B7_H3K4me1_s_chr19.fastq.gz
Approx 50% complete for B7_H3K4me1_s_chr19.fastq.gz
Approx 55% complete for B7_H3K4me1_s_chr19.fastq.gz
Approx 60% complete for B7_H3K4me1_s_chr19.fastq.gz
...
If you have to submit a job to a HPC you need to use the corresponding program, qsub or sbatch.
qsub .command.run
Adding more processes
We can build a pipeline incrementally adding more and more processes. Nextflow will take care of the dependencies between the input / output and of the parallelization.
Let’s add to the test2.nf pipeline two additional steps, indexing of the reference genome and the read alignment using Bowtie. For that we will have to modify the *.nf, params.config and nexflow.config files (the full solution is available in the test3 folder on the GitHub).
In params.config, we have to add new parameters:
params {
        reads           = "$baseDir/../../testdata/*.fastq.gz"
        reference       = "$baseDir/../../testdata/chr19.fasta.gz"
        outdir          = "$baseDir"
        //outdir          = "s3://class-bucket-1/results"
        email           = "myemail@google.com"
}
In test3.nf, we have to add a new input for the reference sequence:
log.info """
BIOCORE@CRG - N F TESTPIPE  ~  version ${version}
=============================================
reads                           : ${params.reads}
reference                       : ${params.reference}
outdir                          : ${params.outdir}

"""

reference = file(params.reference)
This way, the singleton channel called reference is created. Its content can be used indefinitely. We also add a path specifying where to place the output files.
/*
 * Defining the output folders.
 */
fastqcOutputFolder    = "${params.outdir}/output_fastqc"
alnOutputFolder       = "${params.outdir}/output_aln"
multiqcOutputFolder   = "${params.outdir}/output_multiQC"
And we have to add two new processes. The first one is for the indexing the reference genome (with bowtie-build):
/*
 * Process 2. Bowtie index
 */
process bowtieIdx {
    tag { "${ref}" }

    input:
    path ref

    output:
    tuple val("${ref}"), path ("${ref}*.ebwt")

    script:
    """
        gunzip -c ${ref} > reference.fa
        bowtie-build reference.fa ${ref}
        rm reference.fa
    """
}
Since bowtie indexing requires unzipped reference fasta file, we first gunzip it, then build the reference index, and finally remove the unzipped file.
The output channel is organized as a tuple; i.e., a list of elements.
The first element of the list is the name of the index as a value, the second is a list of files constituting the index.
The former is needed for building the command line of the alignment step, the latter are the files needed for the alignment.
The second process bowtieAln is the alignment step:
/*
 * Process 3. Bowtie alignment
 */
process bowtieAln {
    publishDir alnOutputFolder, pattern: '*.sam'

    tag { "${reads}" }
    label 'twocpus'

    input:
    tuple val(refname), path (ref_files)
    path reads

    output:
    path "${reads}.sam", emit: samples_sam
    path "${reads}.log", emit: samples_log

    script:
    """
    bowtie -p ${task.cpus} ${refname} -q ${reads} -S > ${reads}.sam 2> ${reads}.log
    """
}
There are two different input channels, the index and reads.
The index name specified by refname is used for building the command line; while the index files, indicated by ref_files, are linked to the current directory by using the path qualifier.
We also produced two kind of outputs, the alignments and logs. The first one is the one we want to keep as a final result; for that, we specify the pattern parameter in publishDir.
publishDir alnOutputFolder, pattern: '*.sam'
The second output will be passed to the next process, that is, the multiQC process. To distinguish the outputs let’s assign them different names.
output:
    path "${reads}.sam", emit: samples_sam
    path "${reads}.log", emit: samples_log
This section will allow us to connect these outputs directly with other processes when we call them in the workflow section:
workflow {
        fastqc_out = fastQC(reads)
        bowtie_index = bowtieIdx(reference)
        bowtieAln(bowtie_index, reads)
        multiQC(fastqc_out.mix(bowtieAln.out.samples_log).collect())
}
As you can see, we passed the samples_log output to the multiqc process after mixing it with the output channel from the fastqc process.
Profiles
For deploying a pipeline in a cluster or Cloud, in the nextflow.config file, we need to indicate what kind of the executor to use.
In the Nextflow framework architecture, the executor indicates which the batch-queue system to use to submit jobs to a HPC or to Cloud.
The executor is completely abstracted, so you can switch from SGE to SLURM just by changing this parameter in the configuration file.
You can group different classes of configuration or profiles within a single nextflow.config file.
Let’s inspect the nextflow.config file in test3 folder. We can see three different profiles:
standard
cluster
cloud
The first profile indicates the resources needed for running the pipeline locally. They are quite small since we have little power and CPU on the test node.
profiles {
  standard {
     process {
        containerOptions = { workflow.containerEngine == "docker" ? '-u $(id -u):$(id -g)': null}
        executor="local"
        memory='0.6G'
        cpus='1'
        time='6h'

        withLabel: 'twocpus' {
            memory='0.6G'
            cpus='1'
        }
          }
   }
As you can see, we explicitly indicated the local executor. By definition, the local executor is a default executor if the pipeline is run without specifying a profile.
The second profile is for running the pipeline on the cluster; here in particular for the cluster supporting the Sun Grid Engine queuing system:
cluster {
  process {
     containerOptions = { workflow.containerEngine == "docker" ? '-u $(id -u):$(id -g)': null}
     executor="SGE"
     queue="smallcpus"

     memory='1G'
     cpus='1'
     time='6h'

     withLabel: 'twocpus' {
         queue="bigcpus"
         memory='4G'
         cpus='2'
     }
   }
}
This profile indicates that the system uses Sun Grid Engine as a job scheduler and that we have different queues for small jobs and more intensive ones.
Deployment in the AWS cloud
The final profile is for running the pipeline in the Amazon Cloud, known as Amazon Web Services or AWS. In particular, we will use AWS Batch that allows the execution of containerised workloads in the Amazon cloud infrastructure (where NNNN is the number of your bucket which you can see in the mounted folder /mnt by typing the command df).
 cloud {
  workDir = 's3://nf-class-bucket-NNNN/work'
  aws.region = 'eu-central-1'
  aws.batch.cliPath = '/home/ec2-user/miniconda/bin/aws'

 process {
     containerOptions = { workflow.containerEngine == "docker" ? '-u $(id -u):$(id -g)': null}
     executor = 'awsbatch'
     queue = 'spot'
     memory='1G'
     cpus='1'
     time='6h'

     withLabel: 'twocpus' {
         memory='0.6G'
         cpus='2'
     }
  }
}
We indicate the AWS specific parameters (region and cliPath) and the executor awsbatch. Then we indicate the working directory, that should be mounted as S3 volume. This is mandatory when running Nextflow on the cloud.
We can now launch the pipeline indicating -profile cloud:
nextflow run test3.nf -bg -with-docker -profile cloud > log
Note that there is no longer a work folder in the directory where test3.nf is located, because, in the AWS cloud, the output is copied locally in the folder /mnt/class-bucket-NNN/work (you can see the mounted folder - and the correspondign number - typing df).
The multiqc report can be seen on the AWS webpage at https://nf-class-bucket-NNN.s3.eu-central-1.amazonaws.com/results/ouptut_multiQC/multiqc_report.html
But you need before to change permissions for that file as (where NNNN is the number of your bucket):
chmod 775 /mnt/class-bucket-NNNN/results/ouptut_multiQCmultiqc_report.html
Sometimes you can find that the Nextflow process itself is very memory intensive and the main node can run out of memory. To avoid this, you can reduce the memory needed by setting an environmental variable:
export NXF_OPTS="-Xms50m -Xmx500m"
Again we can copy the output file to the bucket.
We can also tell Nextflow to directly copy the output file to the S3 bucket: to do so, change the parameter outdir in the params file (use the bucket corresponding to your AWS instance):
outdir = "s3://nf-class-bucket-NNNN/results"
EXERCISE
Modify the test3.nf file to make two sub-workflows:
for fastqc of fastq files and bowtie alignment;
for a fastqc analysis of the aligned files produced by bowtie.
For convenience you can use the multiqc config file called config.yaml in the multiqc process.
Solution
Solution is in the file test3_2.nf:
Modules and how to re-use the code
A great advantage of the new DSL2 is to allow the modularization of the code. In particular, you can move a named workflow within a module and keep it aside for being accessed by different pipelines.
The test4 folder provides an example of using modules.
#!/usr/bin/env nextflow

nextflow.enable.dsl=2

/*
 * Input parameters: read pairs
 * Params are stored in the params.config file
 */

version                 = "1.0"
params.help             = false

// this prints the input parameters
log.info """
BIOCORE@CRG - N F TESTPIPE  ~  version ${version}
=============================================
reads                           : ${params.reads}
"""

if (params.help) {
    log.info 'This is the Biocore\'s NF test pipeline'
    log.info 'Enjoy!'
    log.info '\n'
    exit 1
}

/*
 * Defining the output folders.
 */
fastqcOutputFolder    = "output_fastqc"
multiqcOutputFolder   = "output_multiQC"


Channel
    .fromPath( params.reads )
    .ifEmpty { error "Cannot find any reads matching: ${params.reads}" }
    .set {reads_for_fastqc}


/*
 * Here we include two modules from two files. We also add the parameter OUTPUT to pass them the folders where to publish the results
 */
include { fastqc } from "${baseDir}/modules/fastqc" addParams(OUTPUT: fastqcOutputFolder)
include { multiqc } from "${baseDir}/modules/multiqc" addParams(OUTPUT: multiqcOutputFolder)

// The main worflow can directly call the named workflows from the modules
workflow {
        fastqc_out = fastqc(reads_for_fastqc)
        multiqc(fastqc_out.collect())
}


workflow.onComplete {
        println ( workflow.success ? "\nDone! Open the following report in your browser --> ${multiqcOutputFolder}/multiqc_report.html\n" : "Oops .. something went wrong" )
}
We now include two modules, named fastqc and multiqc, from `${baseDir}/modules/fastqc.nf` and `${baseDir}/modules/multiqc.nf`.
Let’s inspect the fastqc module:
/*
*  fastqc module
*/

params.CONTAINER = "quay.io/biocontainers/fastqc:0.11.9--0"
params.OUTPUT = "fastqc_output"

process fastqc {
    publishDir(params.OUTPUT, mode: 'copy')
    tag { "${reads}" }
    container params.CONTAINER

    input:
    path(reads)

    output:
    path("*_fastqc*")

    script:
    """
        fastqc ${reads}
    """
}
Module fastqc takes as input a channel with files containing reads and produces as output the files generated by the fastqc program.
The module contains the directive publishDir, the tag, the container to be used and has similar input, output and script session as the fastqc process in test3.nf.
A module can contain its own parameters that can be used for connecting the main script to some variables inside the module.
In this example we have the declaration of two parameters that are defined at the beginning:
params.CONTAINER = "quay.io/biocontainers/fastqc:0.11.9--0"
params.OUTPUT = "fastqc_output"
They can be overridden from the main script that is calling the module:
The parameter params.OUTPUT can be used for connecting the output of this module with one in the main script.
The parameter params.CONTAINER can be used for declaring the image to use for this particular module.
In this example, in our main script we pass only the OUTPUT parameters by writing them as follows:
include { fastqc } from "${baseDir}/lib/fastqc" addParams(OUTPUT: fastqcOutputFolder)
include { multiqc } from "${baseDir}/lib/multiqc" addParams(OUTPUT: multiqcOutputFolder)
While we keep the information of the container inside the module for better reproducibility:
params.CONTAINER = = "quay.io/biocontainers/fastqc:0.11.9--0"
Here you see that we are not using our own image, but rather we use the image provided by biocontainers in quay.
Here you can find a list of fastqc images developed and stored by the biocontainers community https://biocontainers.pro/#/tools/fastqc.
Let’s have a look at the multiqc.nf module:
/*
*  multiqc module
*/

params.CONTAINER = "quay.io/biocontainers/multiqc:1.9--pyh9f0ad1d_0"
params.OUTPUT = "multiqc_output"
params.LABEL = ""

process multiqc {
    publishDir(params.OUTPUT, mode: 'copy')
    container params.CONTAINER
    label (params.LABEL)

    input:
    path (inputfiles)

    output:
    path "multiqc_report.html"

    script:
    """
    multiqc .
    """
}
It is very similar to the fastqc one: we just add an extra parameter for connecting the resources defined in the nextflow.config file and the label indicated in the process.
To use this module, we have to change the main code as follows:
include { multiqc } from "${baseDir}/lib/multiqc" addParams(OUTPUT: multiqcOutputFolder, LABEL="onecpu")
The label onecpu is specified in the nextflow.config file:
includeConfig "$baseDir/params.config"

process {
     container = 'biocorecrg/debian-perlbrew-pyenv3-java'
     memory='0.6G'
     cpus='1'
     time='6h'

     withLabel: 'onecpu'
        {
                memory='0.6G'
                cpus='1'
        }

}

singularity.cacheDir = "$baseDir/singularity"
Note
IMPORTANT: You have to specify a default image to run nextflow -with-docker or -with-singularity and you have to have a container(s) defined inside modules.
EXERCISE
Make a module wrapper for the bowtie tool and change the script in test3 accordingly.
Solution
Solution in the folder test5
Reporting and graphical interface
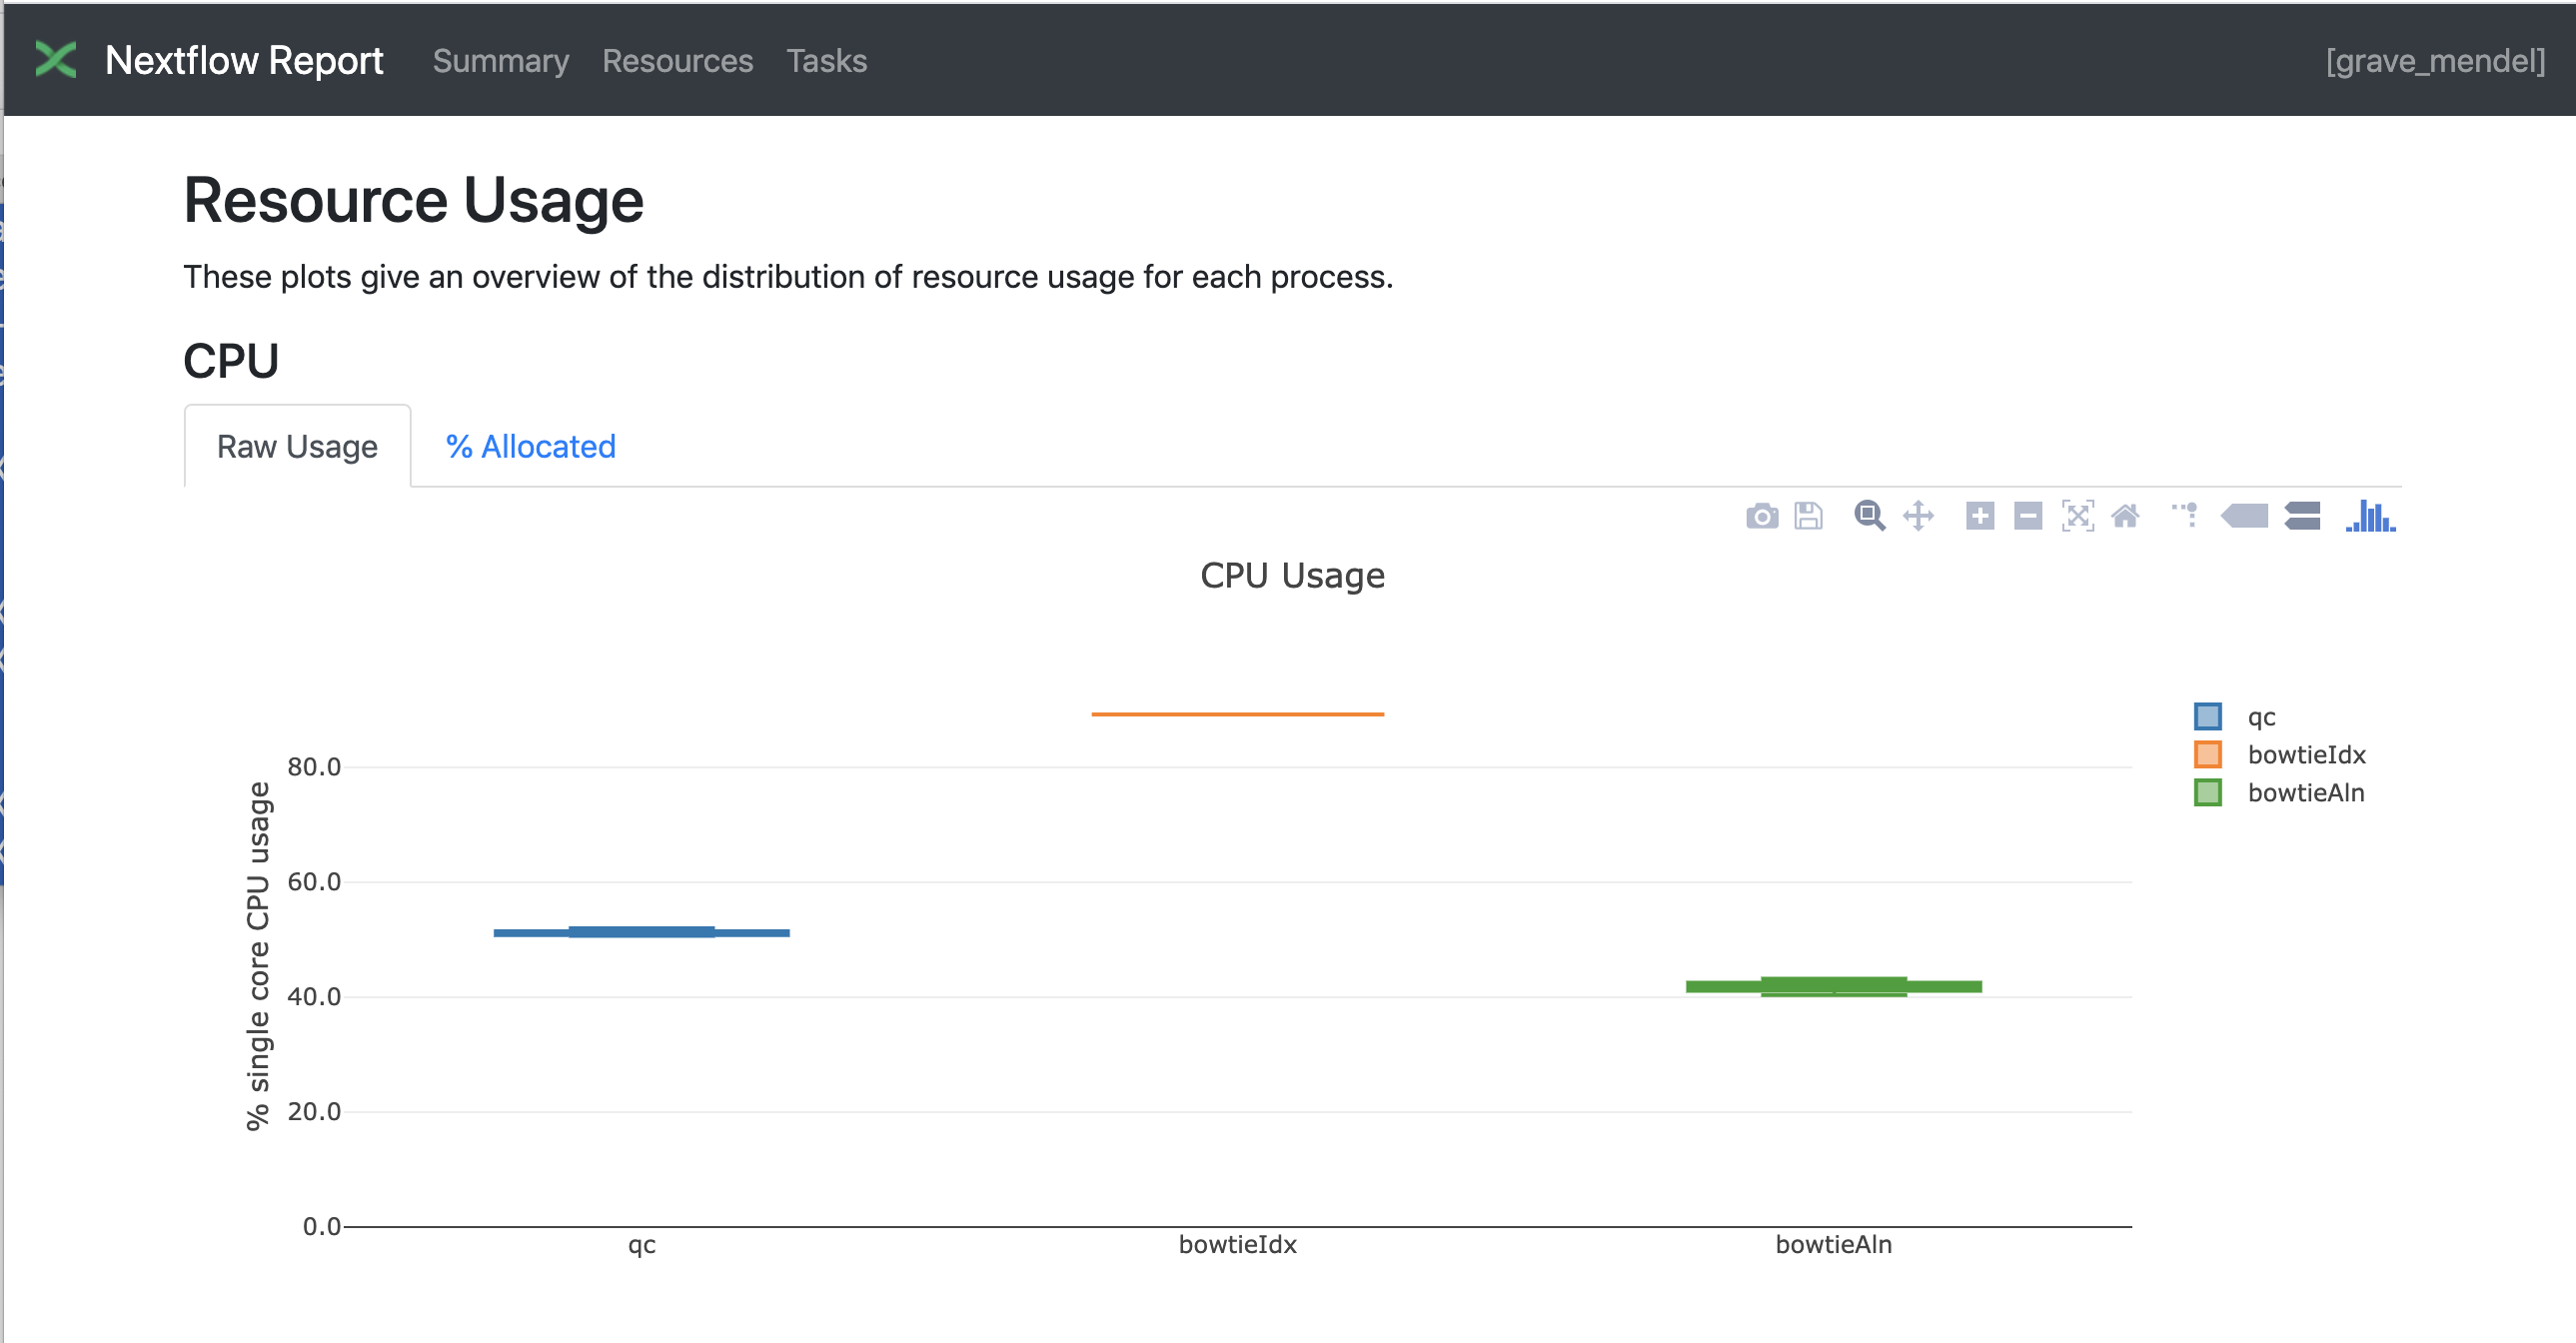
Nextflow has an embedded function for reporting informations about the resources requested for each job and the timing; to generate a html report, run Nextflow with the -with-report parameter :
nextflow run test5.nf -with-docker -bg -with-report > log
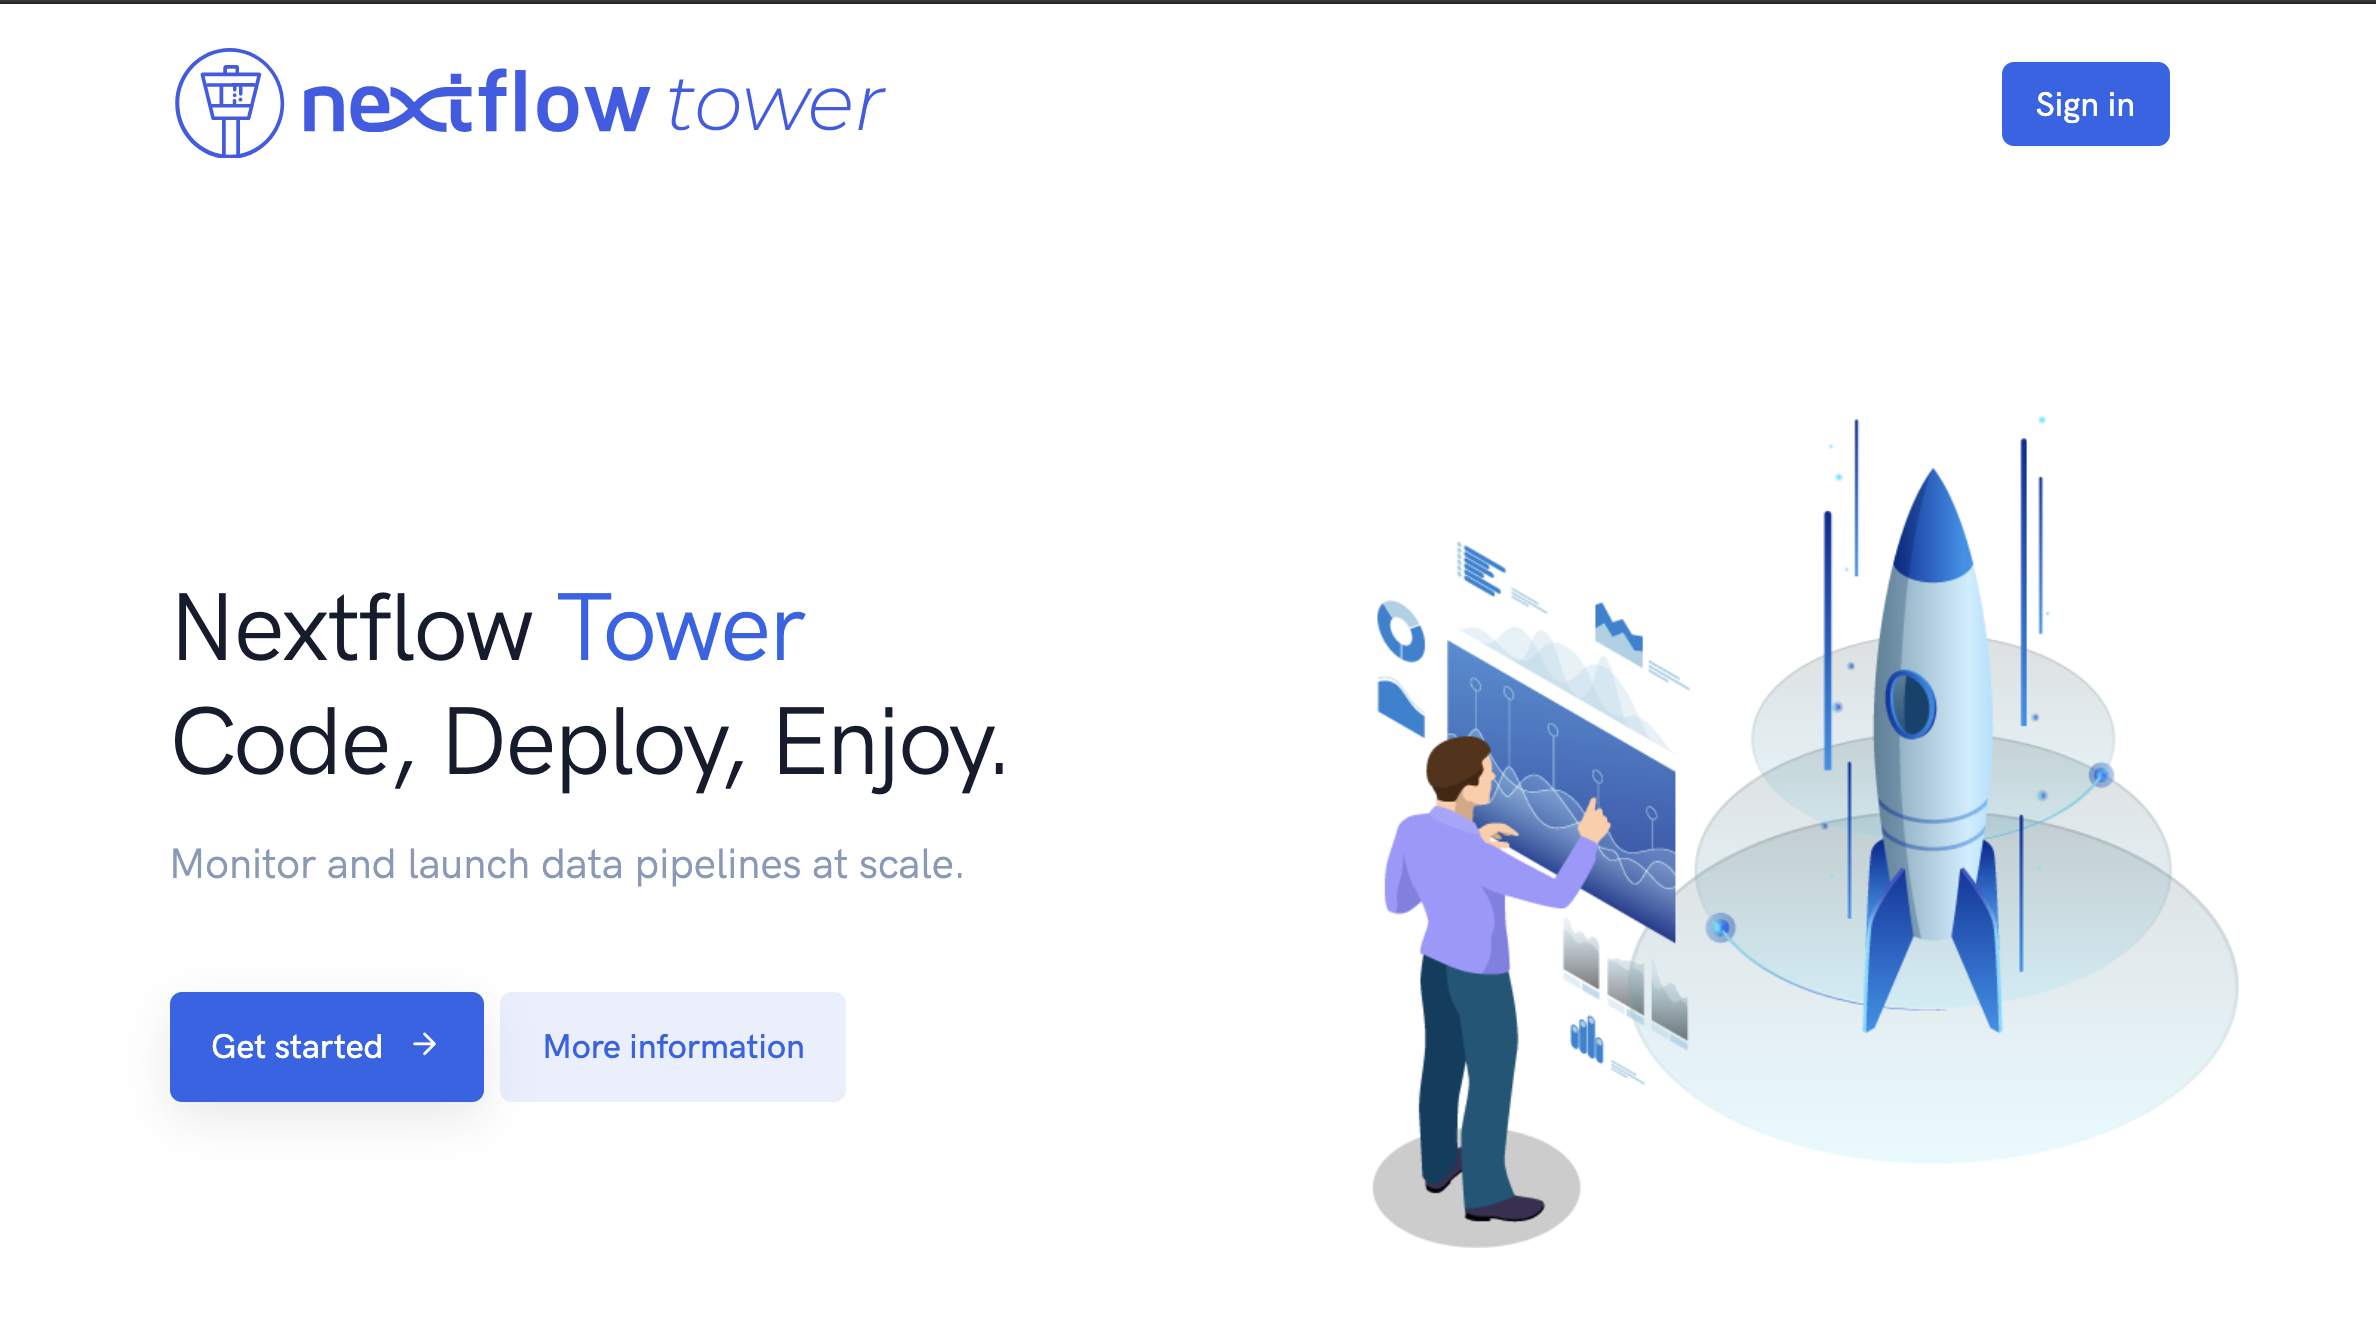
Nextflow Tower is an open source monitoring and managing platform for Nextflow workflows. There are two versions:
Open source for monitoring of single pipelines.
Commercial one for workflow management, monitoring and resource optimisation.
We will show the open source one.
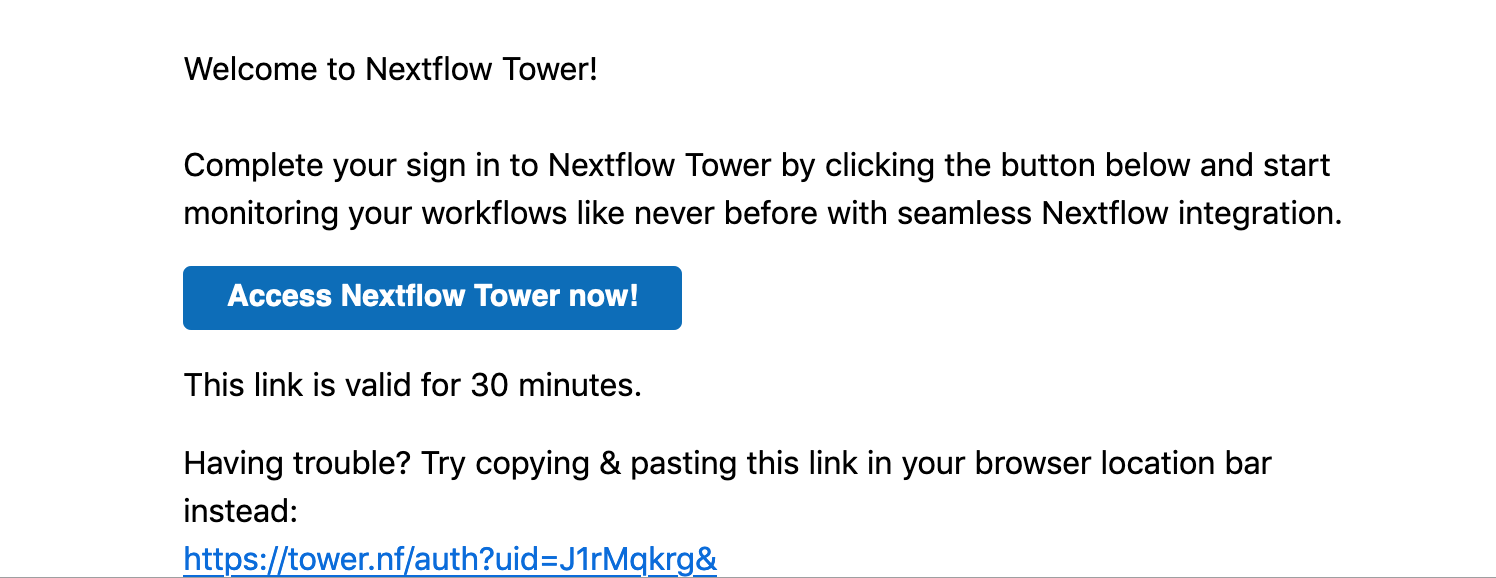
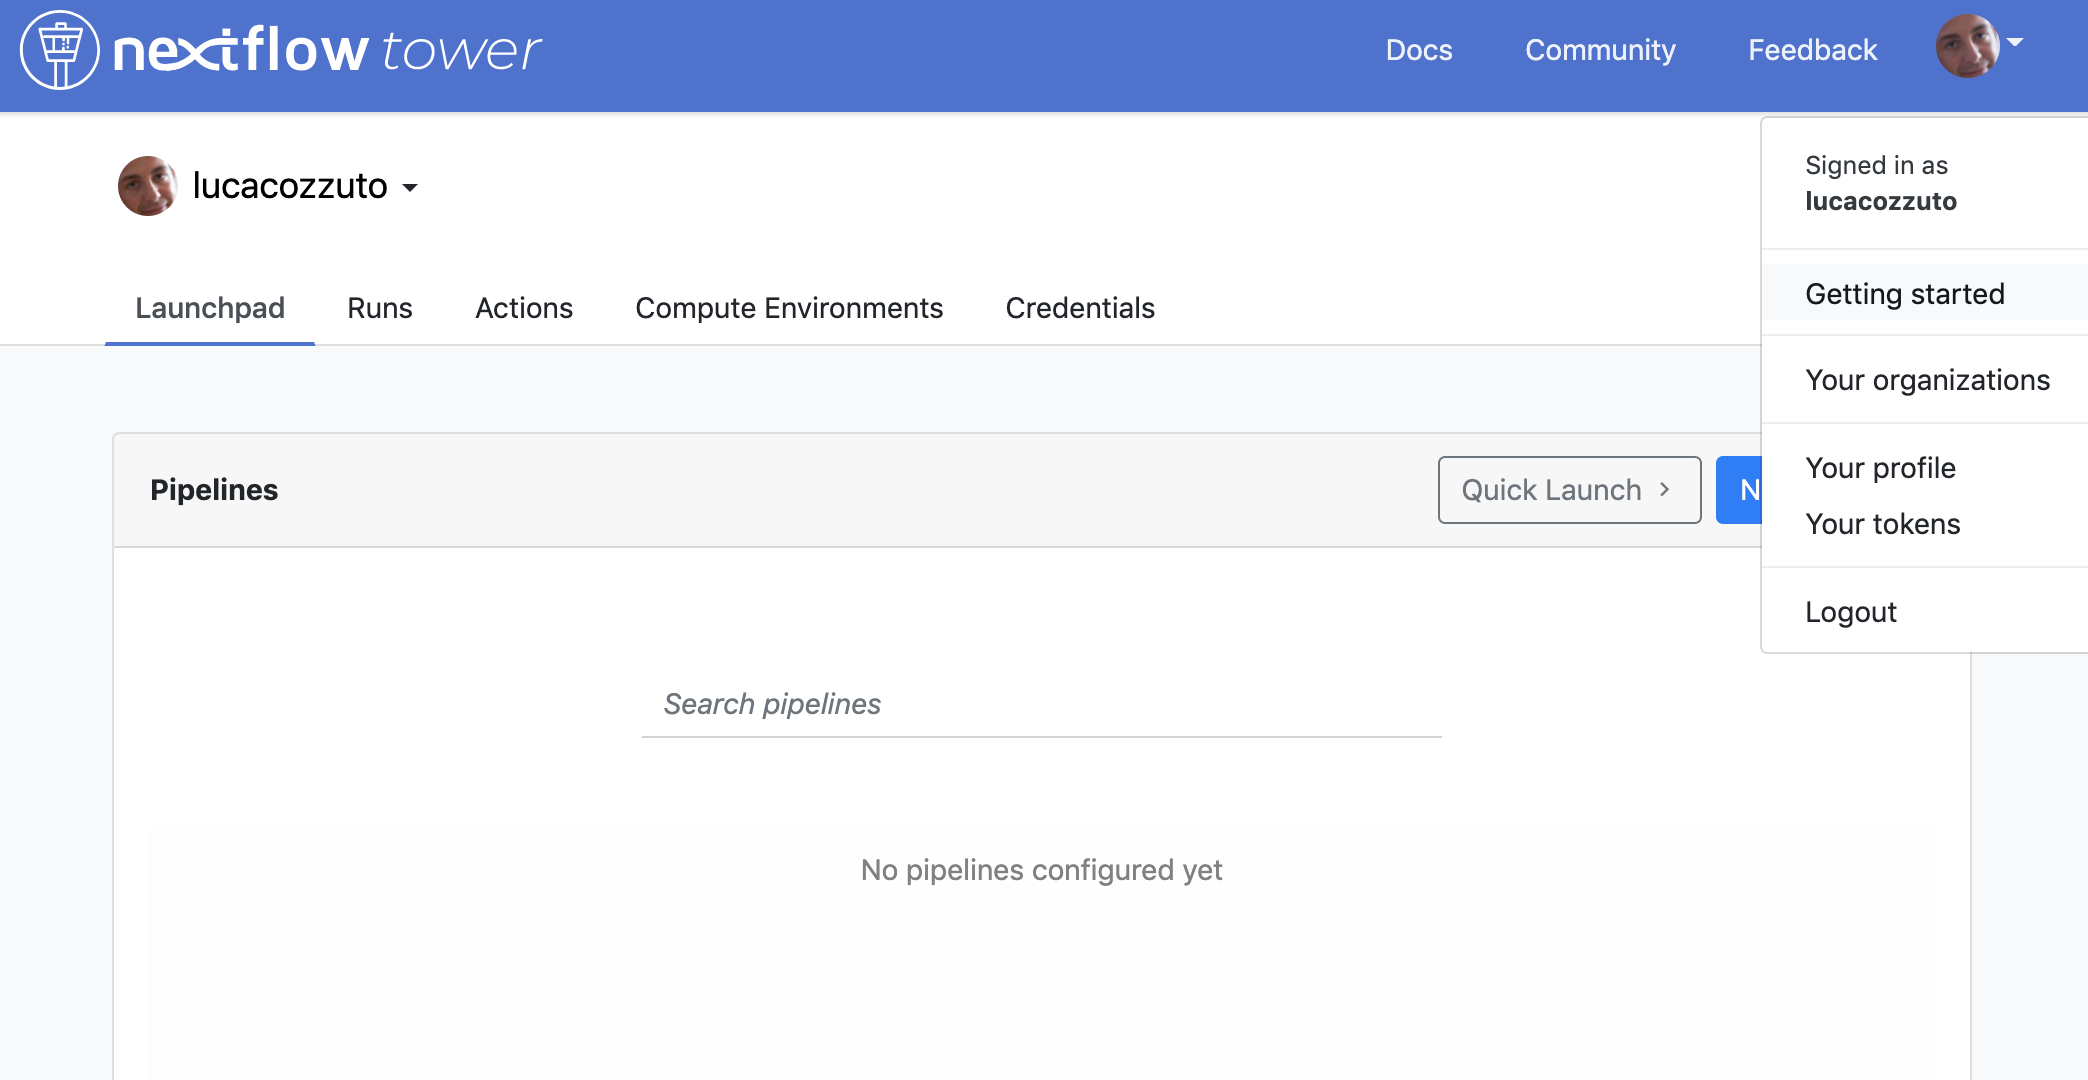
First, you need to access the tower.nf website and login.
If you selected the email for receiving the instructions and the token to be used.
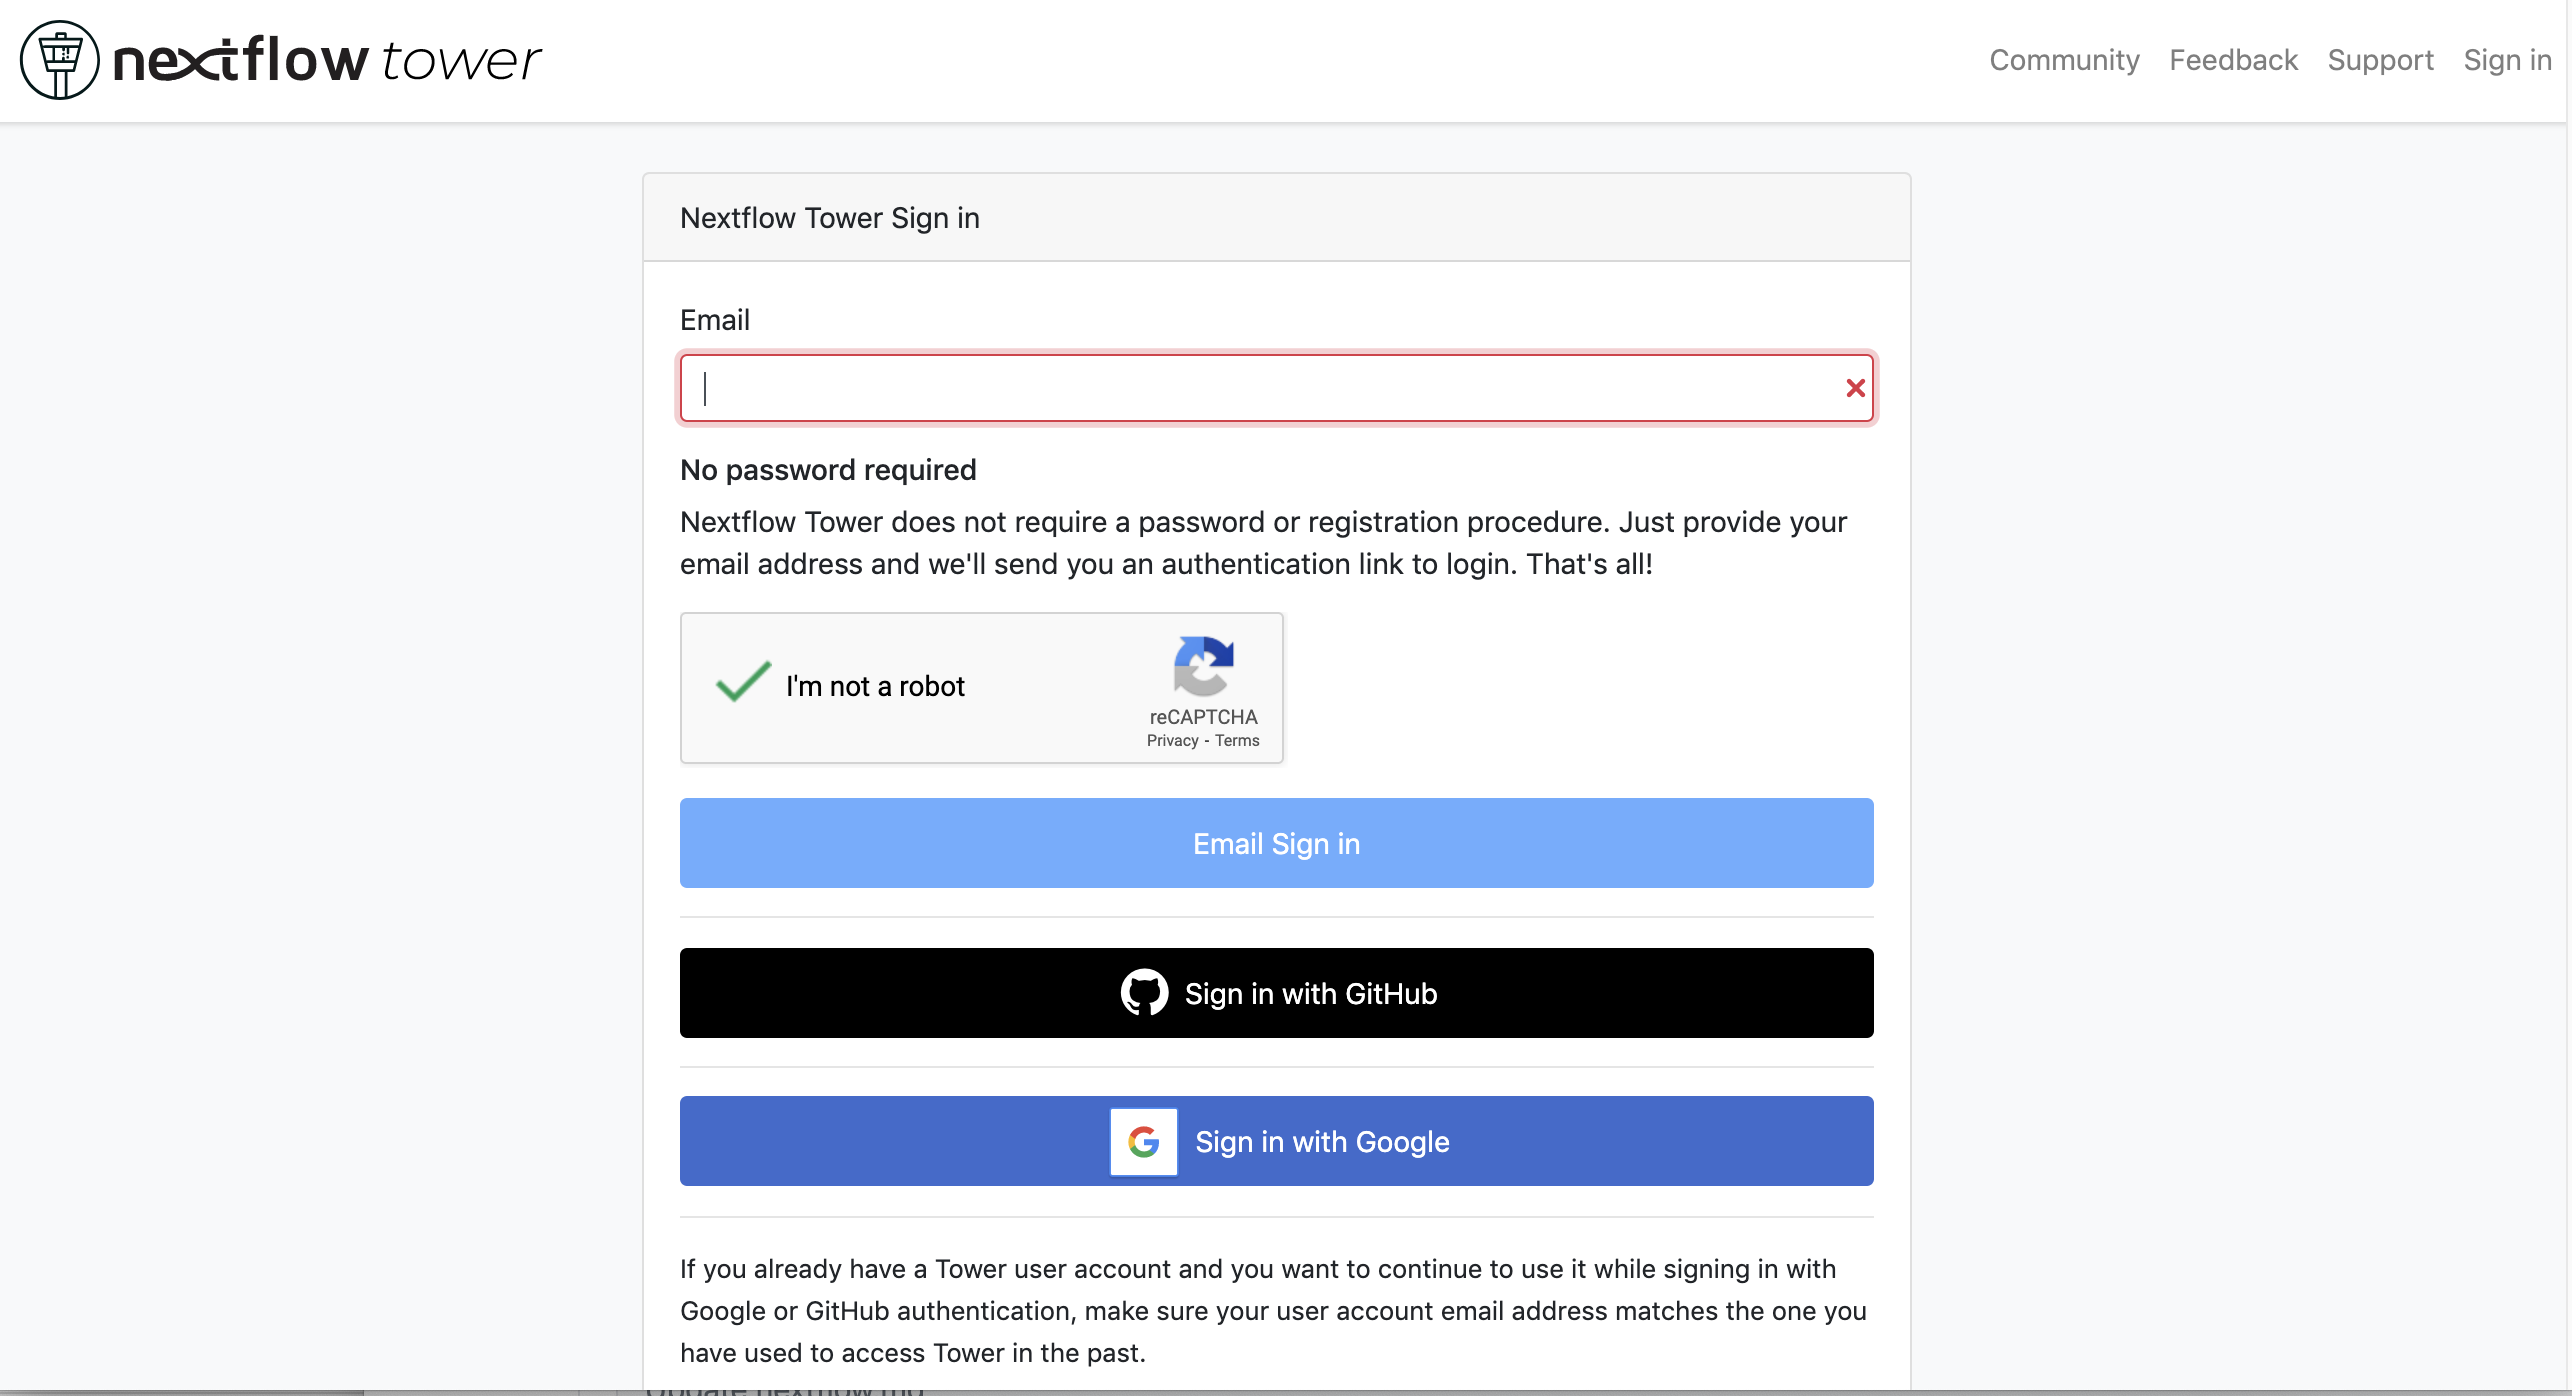
check the email:
You can generate your token at https://tower.nf/tokens and copy paste it in your pipeline using this snippet in the configuration file:
tower {
  accessToken = '<YOUR TOKEN>'
  enabled = true
}
or exporting those environmental variables:
export TOWER_ACCESS_TOKEN=*******YOUR***TOKEN*****HERE*******
export NXF_VER=21.04.0
Now we can launch the pipeline:
nextflow run test5.nf -with-singularity -with-tower -bg > log


CAPSULE: Downloading dependency io.nextflow:nf-tower:jar:20.09.1-edge
CAPSULE: Downloading dependency org.codehaus.groovy:groovy-nio:jar:3.0.5
CAPSULE: Downloading dependency io.nextflow:nextflow:jar:20.09.1-edge
CAPSULE: Downloading dependency io.nextflow:nf-httpfs:jar:20.09.1-edge
CAPSULE: Downloading dependency org.codehaus.groovy:groovy-json:jar:3.0.5
CAPSULE: Downloading dependency org.codehaus.groovy:groovy:jar:3.0.5
CAPSULE: Downloading dependency io.nextflow:nf-amazon:jar:20.09.1-edge
CAPSULE: Downloading dependency org.codehaus.groovy:groovy-templates:jar:3.0.5
CAPSULE: Downloading dependency org.codehaus.groovy:groovy-xml:jar:3.0.5
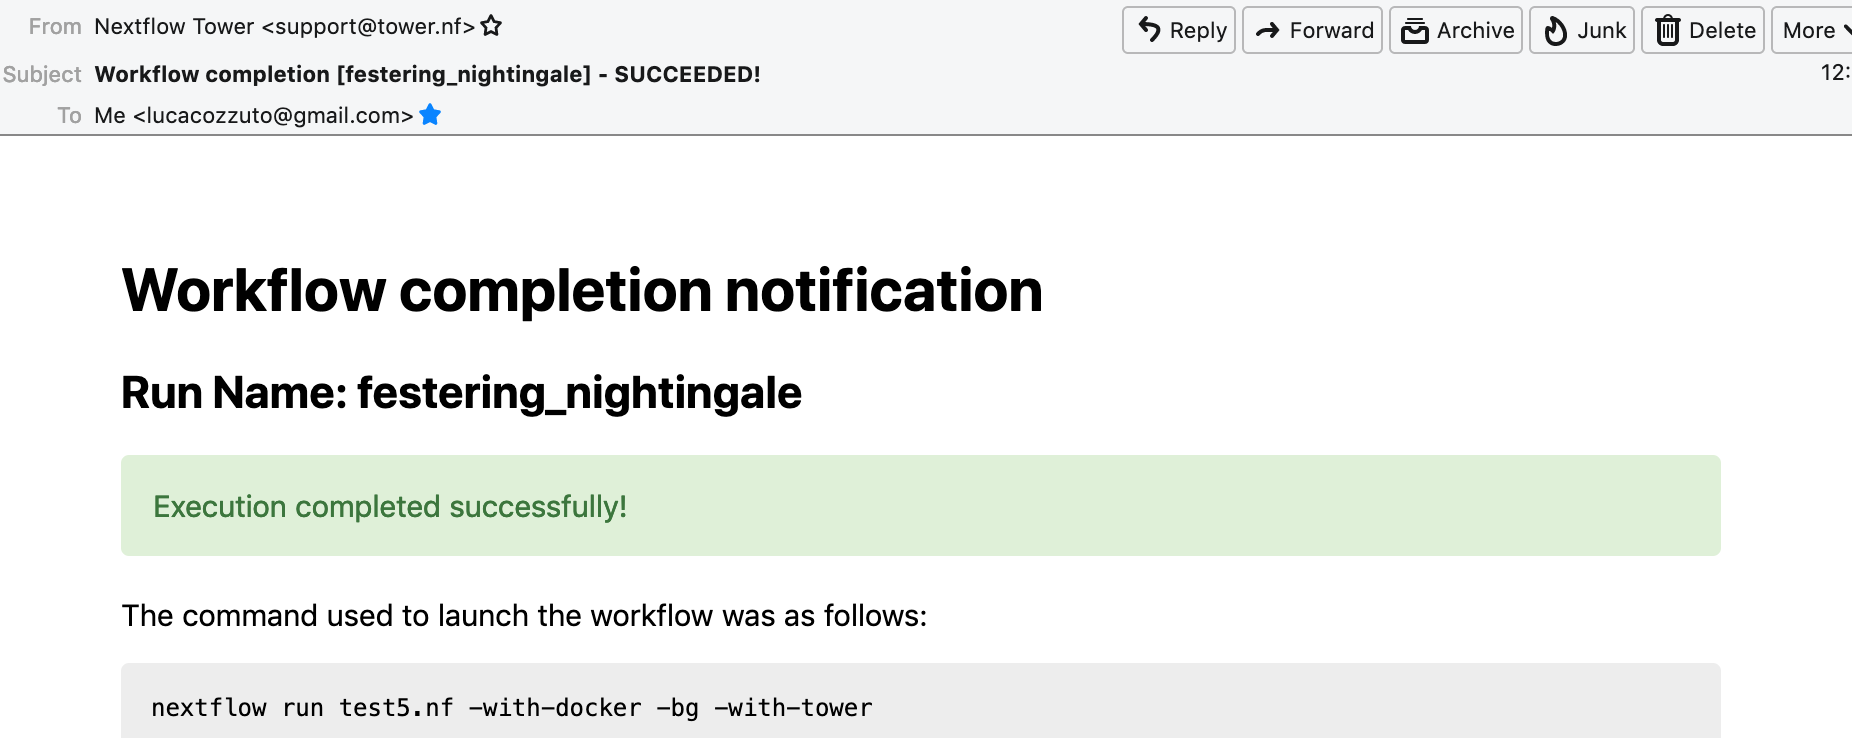
and go to the tower website again:
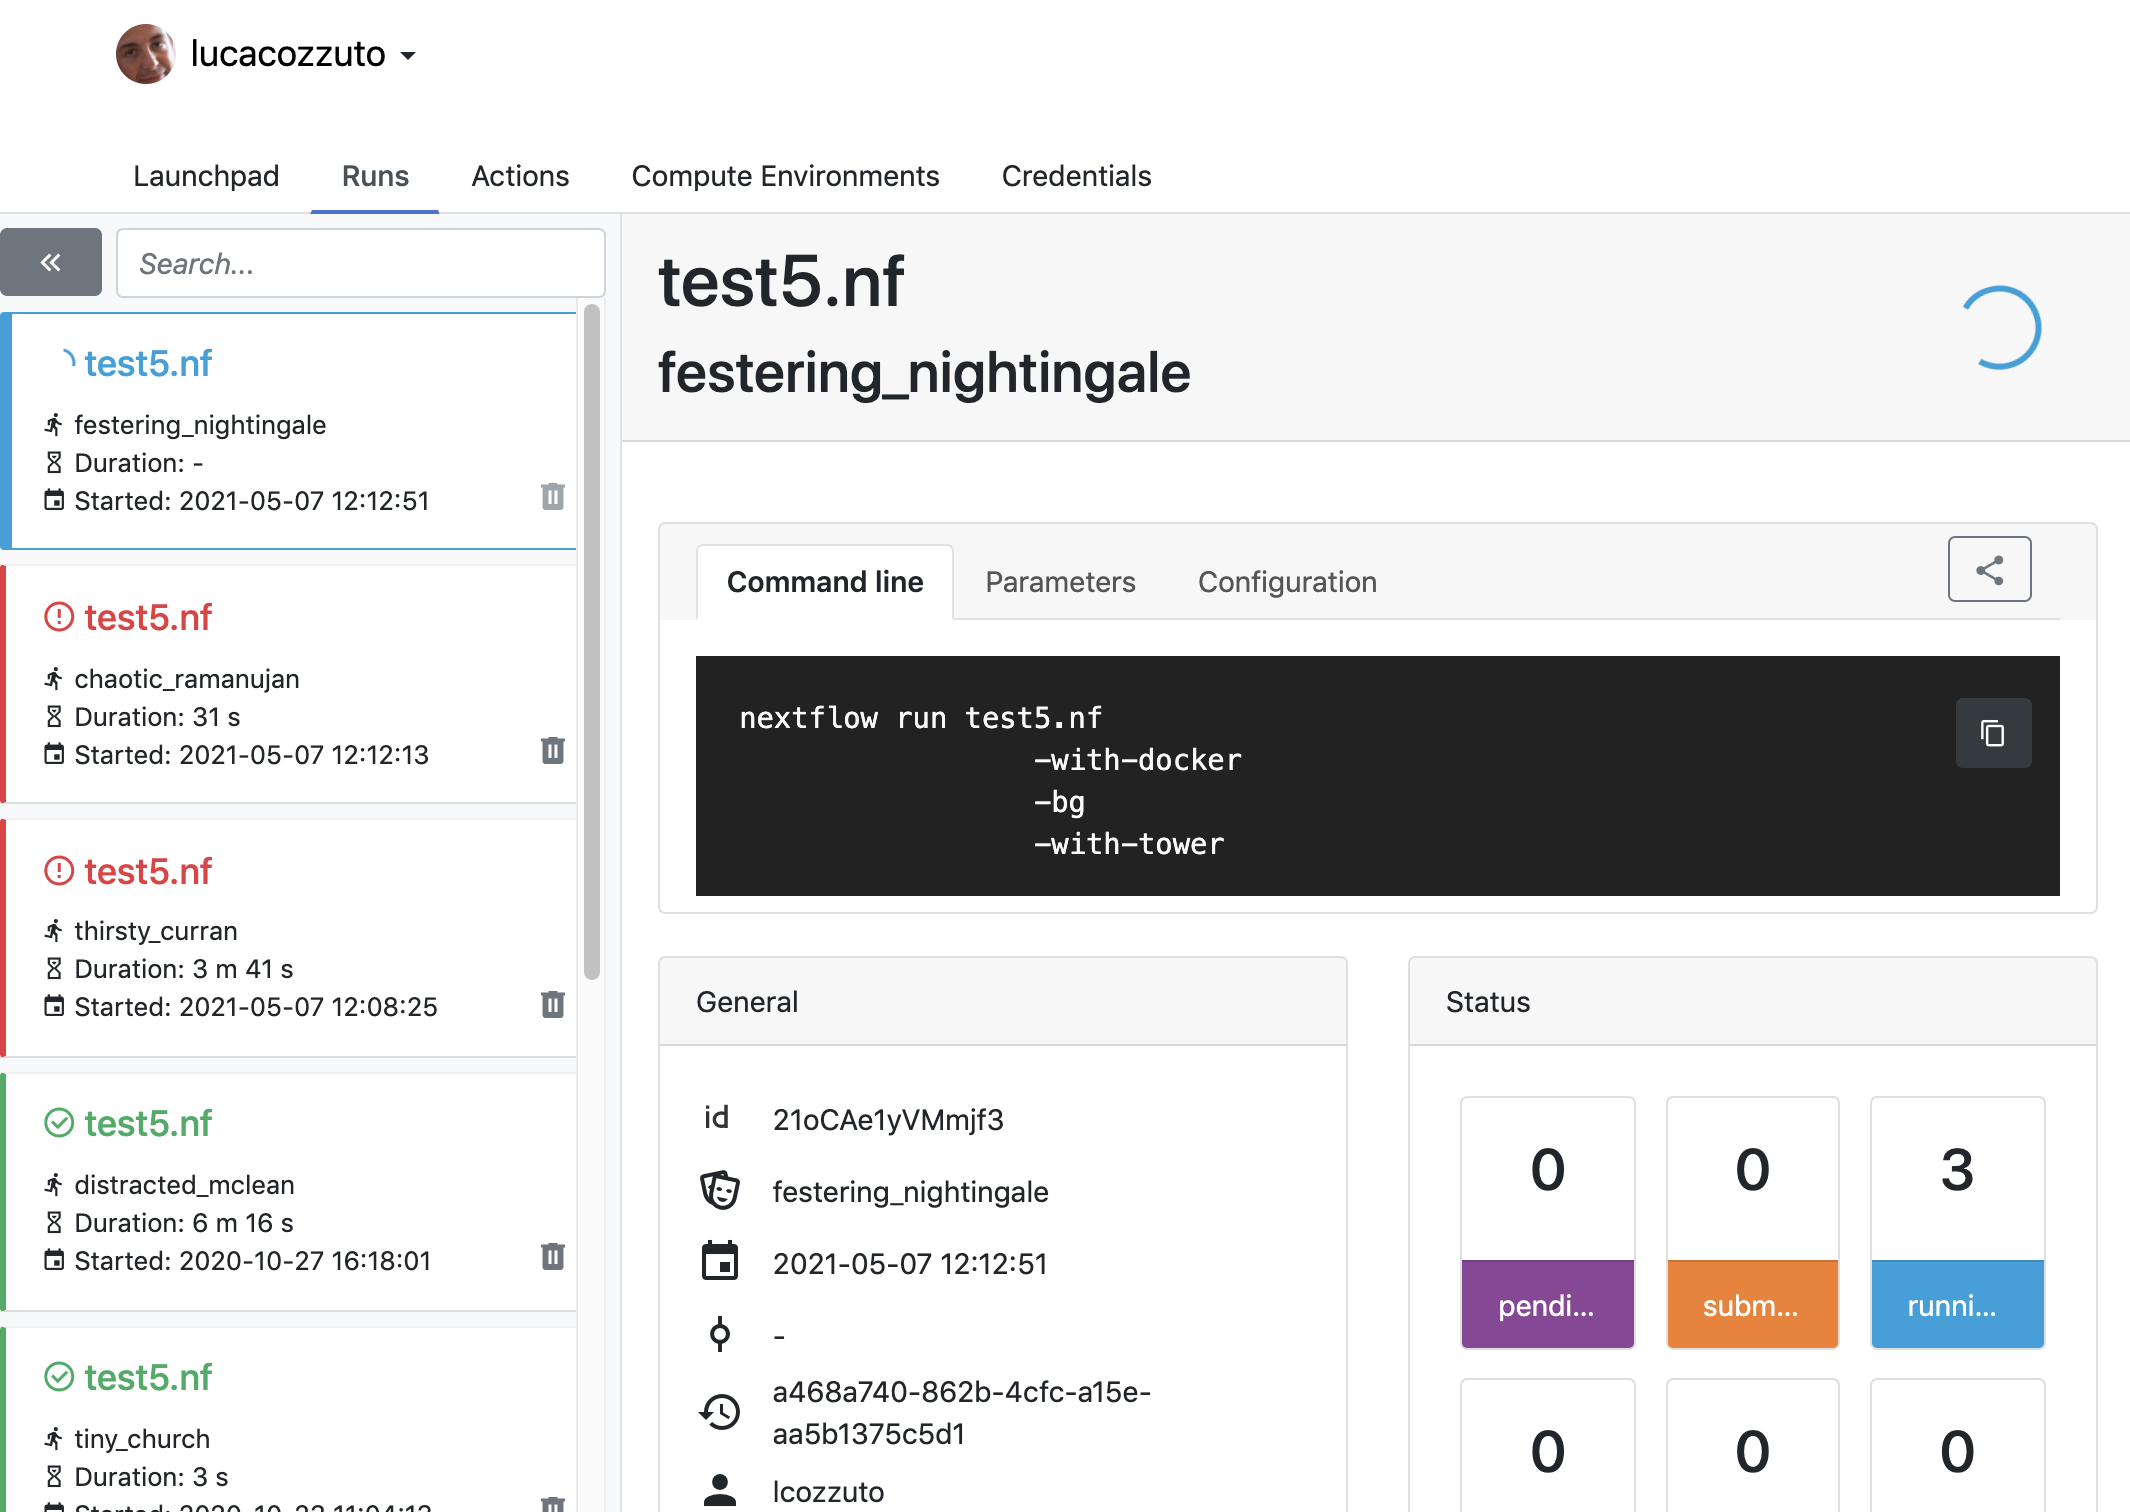
When the pipeline is finished we can also receive a mail.
Share Nextflow pipelines and good practices
Nextflow supports a number of code sharing platforms: BitBucket, GitHub, and GitLab. This feature allows to run pipelines by just pointing to an online repository without caring about downloading etc.
The default platform is GitHub, so we will use this repository as an example.
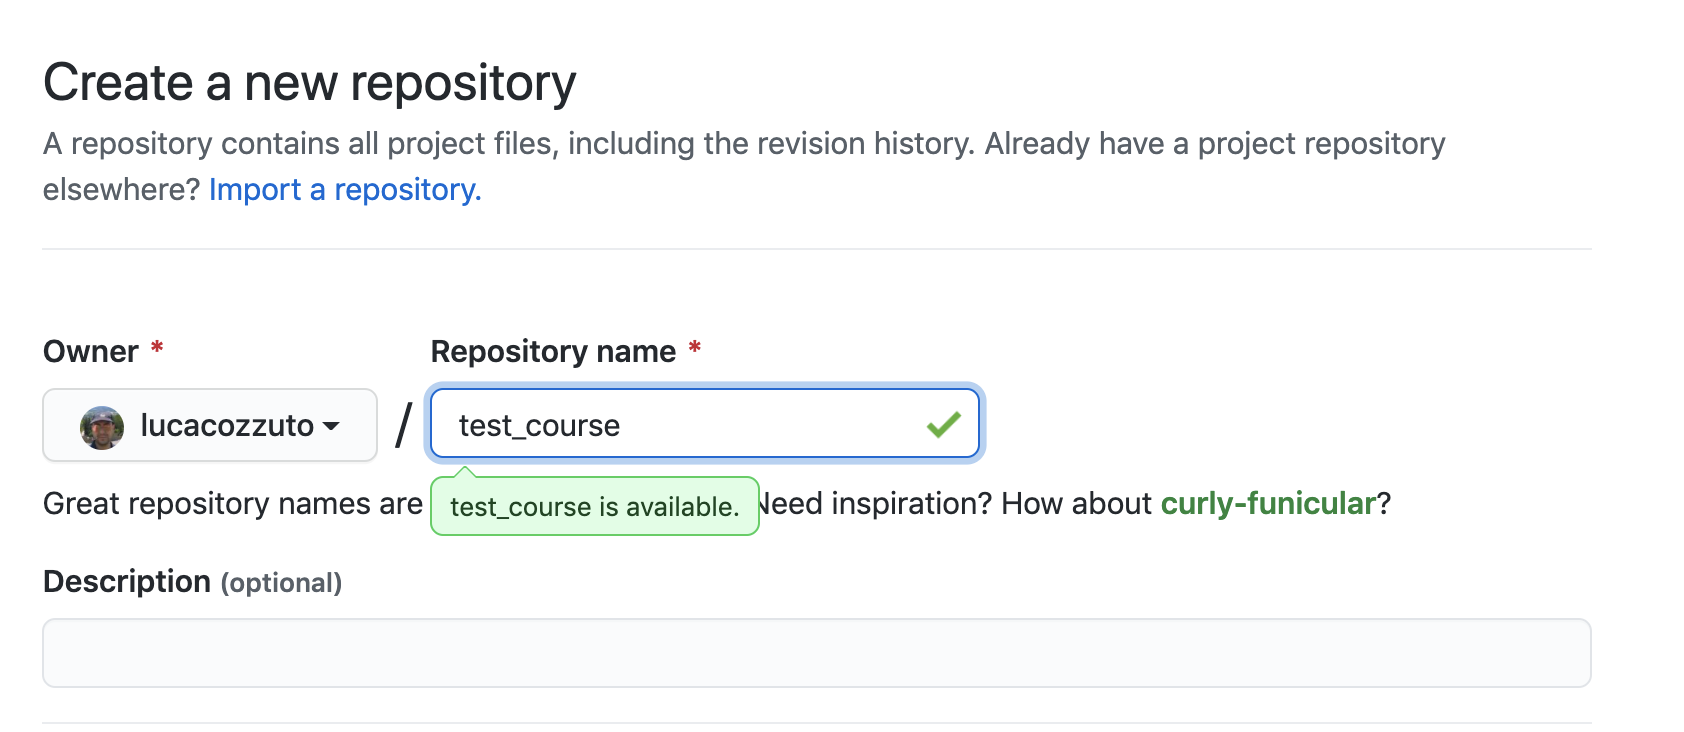
Let’s create a new repository with a unique name:
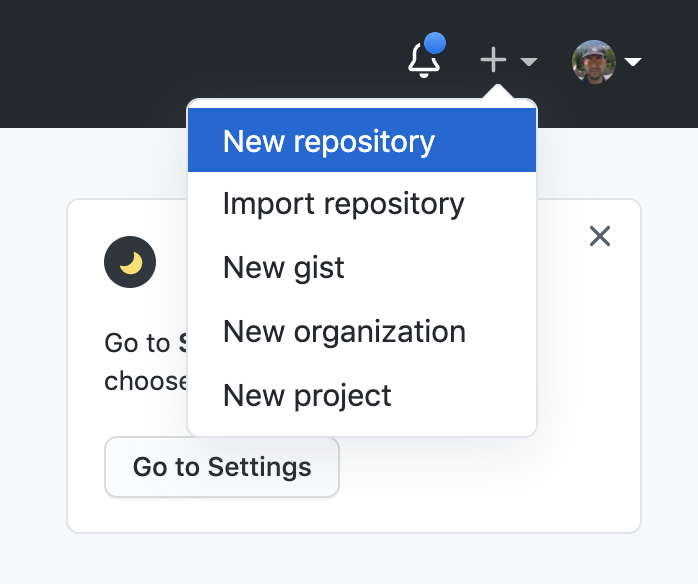
And then let’s clone it in one of our test folder. Let’s choose test5. We can get the url path by clicking like on the figure:
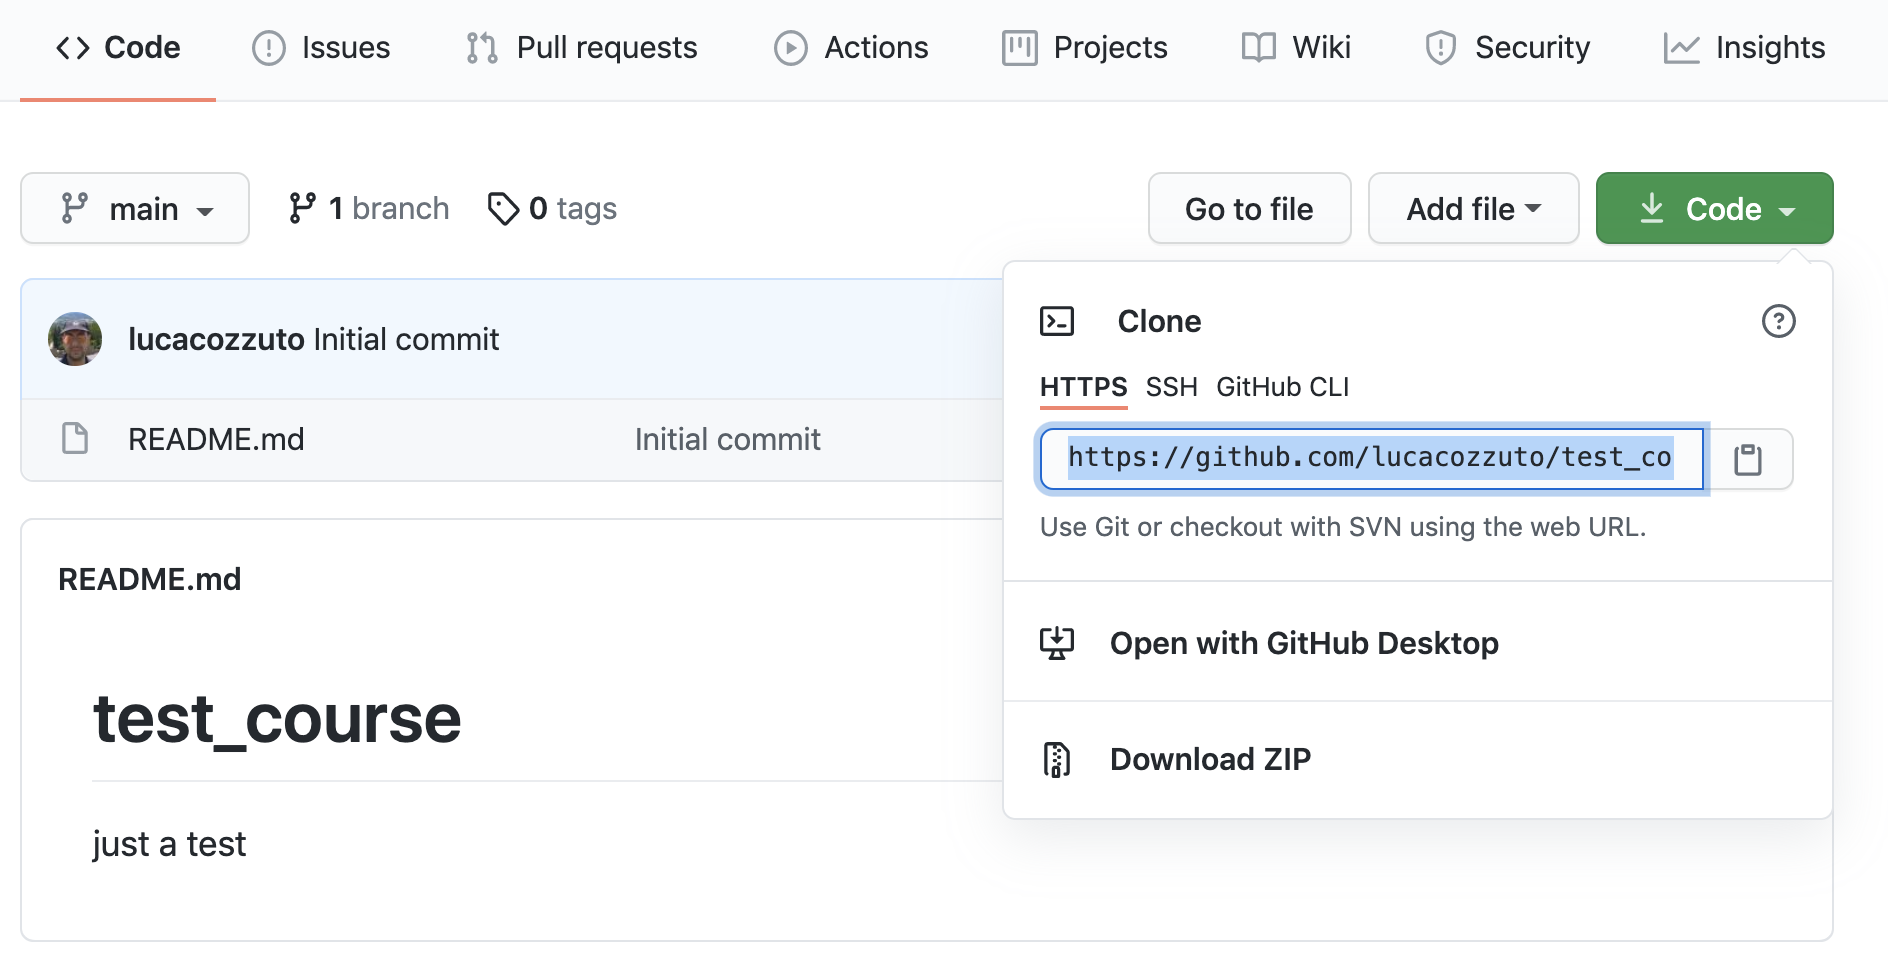
git clone https://github.com/lucacozzuto/test_course.git
Cloning into 'test_course'...
remote: Enumerating objects: 3, done.
remote: Counting objects: 100% (3/3), done.
remote: Total 3 (delta 0), reused 0 (delta 0), pack-reused 0
Unpacking objects: 100% (3/3), done.
We have an almost empty folder named test_course. We can just move or copy our files there:
cp *.* lib -r test_course/
cd test_course

git status

# On branch main
# Untracked files:
#   (use "git add <file>..." to include in what will be committed)
#
#       lib/
#       nextflow.config
#       params.config
#       test5.nf
nothing added to commit but untracked files present (use "git add" to track)
Now we are ready for committing and pushing everything to the online repository. But before we need to rename test5.nf to main.nf.
mv test5.nf main.nf

git add *

git status
# On branch main
# Changes to be committed:
#   (use "git reset HEAD <file>..." to unstage)
#
#       new file:   lib/bowtie.nf
#       new file:   lib/fastqc.nf
#       new file:   lib/multiqc.nf
#       new file:   nextflow.config
#       new file:   params.config
#       new file:   main.nf
#


git commit -m "first commit"

[main 7681f85] first commit
 6 files changed, 186 insertions(+)
 create mode 100644 lib/bowtie.nf
 create mode 100644 lib/fastqc.nf
 create mode 100644 lib/multiqc.nf
 create mode 100644 nextflow.config
 create mode 100644 params.config
 create mode 100755 main.nf
[lcozzuto@nextflow test_course]$ git push
Username for 'https://github.com': ######
Password for 'https://######@github.com':
Counting objects: 10, done.
Delta compression using up to 8 threads.
Compressing objects: 100% (7/7), done.
Writing objects: 100% (9/9), 2.62 KiB | 0 bytes/s, done.
Total 9 (delta 0), reused 0 (delta 0)
To https://github.com/lucacozzuto/test_course.git
   bbd6a44..7681f85  main -> main
If we go back to the GitHub website we can see that everything has been uploaded.
Now we can remove that folder and go in the home folder.
rm -fr test_course
cd $HOME
And we can launch directly this pipeline with:
nextflow run lucacozzuto/test_course -with-docker -r main \
--reads "/home/ec2-user/git/CoursesCRG_Containers_Nextflow_May_2021/nextflow/nextflow/testdata/*.fastq.gz" \
--reference "/home/ec2-user/git/CoursesCRG_Containers_Nextflow_May_2021/nextflow/nextflow/testdata/chr19.fasta.gz"
As you can see we just use the repository name and two Nextflow parameters:
-with-docker, for using Docker
-r, for using a specific branch. In this case the main branch.
Then we pass to the pipelines the path of our input files: - –reads - –reference
N E X T F L O W  ~  version 20.10.0
Pulling lucacozzuto/test_course ...
downloaded from https://github.com/lucacozzuto/test_course.git
Launching `lucacozzuto/test_course` [voluminous_feynman] - revision: 95d1028adf [main]
BIOCORE@CRG - N F TESTPIPE  ~  version 1.0
=============================================
reads                           : /home/ec2-user/git/CoursesCRG_Containers_Nextflow_May_2021/nextflow/nextflow/testdata/*.fastq.gz
reference                       : /home/ec2-user/git/CoursesCRG_Containers_Nextflow_May_2021/nextflow/nextflow/testdata/chr19.fasta.gz
executor >  local (5)
[5b/4a36e8] process > fastqc (B7_input_s_chr19.fastq.gz)             [100%] 2 of 2 ✔
[5c/644577] process > BOWTIE:bowtieIdx (chr19.fasta.gz)              [100%] 1 of 1 ✔
executor >  local (5)
[5b/4a36e8] process > fastqc (B7_input_s_chr19.fastq.gz)           [100%] 2 of 2 ✔
[5c/644577] process > BOWTIE:bowtieIdx (chr19.fasta.gz)            [100%] 1 of 1 ✔
[4b/dad392] process > BOWTIE:bowtieAln (B7_input_s_chr19.fastq.gz) [100%] 2 of 2 ✔
/home/ec2-user/work/d1/11fe0bff99f424571033347bf4b042/B7_H3K4me1_s_chr19.fastq.gz.sam
/home/ec2-user/work/4b/dad392b12d2f78f976d2a890ebcaea/B7_input_s_chr19.fastq.gz.sam
Completed at: 27-Apr-2021 20:27:14
Duration    : 1m 26s
CPU hours   : (a few seconds)
Succeeded   : 5
Nextflow first pulls down the required version of the pipeline and stores it in:
/home/ec2-user/.nextflow/assets/lucacozzuto/test_course/
then it pulls the Docker image and runs the pipeline.
You can use the Nextflow command list to see pipelines installed in your environment and the command info to fetch information about the path, repository, etc.
nextflow list
lucacozzuto/test_course
...
nextflow info lucacozzuto/test_course

 project name: lucacozzuto/test_course
 repository  : https://github.com/lucacozzuto/test_course
 local path  : /home/ec2-user/.nextflow/assets/lucacozzuto/test_course
 main script : main.nf
 revision    : * main
Finally, you can update, view or delete a project by using the Nextflow commands pull, view and drop.
nextflow view lucacozzuto/test_course

== content of file: /users/bi/lcozzuto/.nextflow/assets/lucacozzuto/test_course/main.nf
#!/usr/bin/env nextflow

/*
 * Copyright (c) 2013-2020, Centre for Genomic Regulation (CRG).
 *
 *   This file is part of 'CRG_Containers_NextFlow'.
 *
 *   CRG_Containers_NextFlow is free software: you can redistribute it and/or modify
 *   it under the terms of the GNU General Public License as published by
 *   the Free Software Foundation, either version 3 of the License, or
 *   (at your option) any later version.
 *
 *   CRG_Containers_NextFlow is distributed in the hope that it will be useful,
[...]