

Nextflow
What is Nextflow?

Nextflow is a domain specific language for workflow orchestration that stems from Groovy. It enables scalable and reproducible workflows using software containers. It was developed at CRG in the Lab of Cedric Notredame by Paolo Di Tommaso https://github.com/pditommaso. The Nextflow documentantion is available here and you can ask help to the community using their gitter channel
Nextflow has been currently upgrade from DLS1 version to DLS2. In this course we will use exclusively DLS2.
What is Nextflow for?
It is for making pipelines without caring about parallelization, dependencies, intermediate file names, data structures, handling exceptions, resuming executions etc. It was published in Nature Biotechnology in 2017.

There is a growing number of publication mentioning Nextflow in PubMed, since many bioinformaticians are starting to write their pipeline in Nextflow.

Here a curated list of Nextflow pipelines
And here a group of pipelines written in a collaborative way from project NF-core
Some pipelines written in Nextflow are being used for SARS-Cov-2 analysis like:
- the one from the artic Network: ncov2019-artic-nf
- the one used from the CRG / EGA viral Beacon, Master of Pores
- the nf-core pipeline viralrecon
etc.
Main advantages:
- Fast prototyping
You can quickly write a small pipeline that can be expanded incrementally. Each task is independent and can be easily added to other ones. You can reuse your scripts and tools without rewriting / adapting them.
- Reproducibility
Nextflow supports Docker and Singularity containers technology. Their use will make the pipelines reproducible in any unix environment. Nextflow is integrated with GitHub code sharing platform so you can call directly a specific version of pipeline from a repository, download it and use it on the fly.
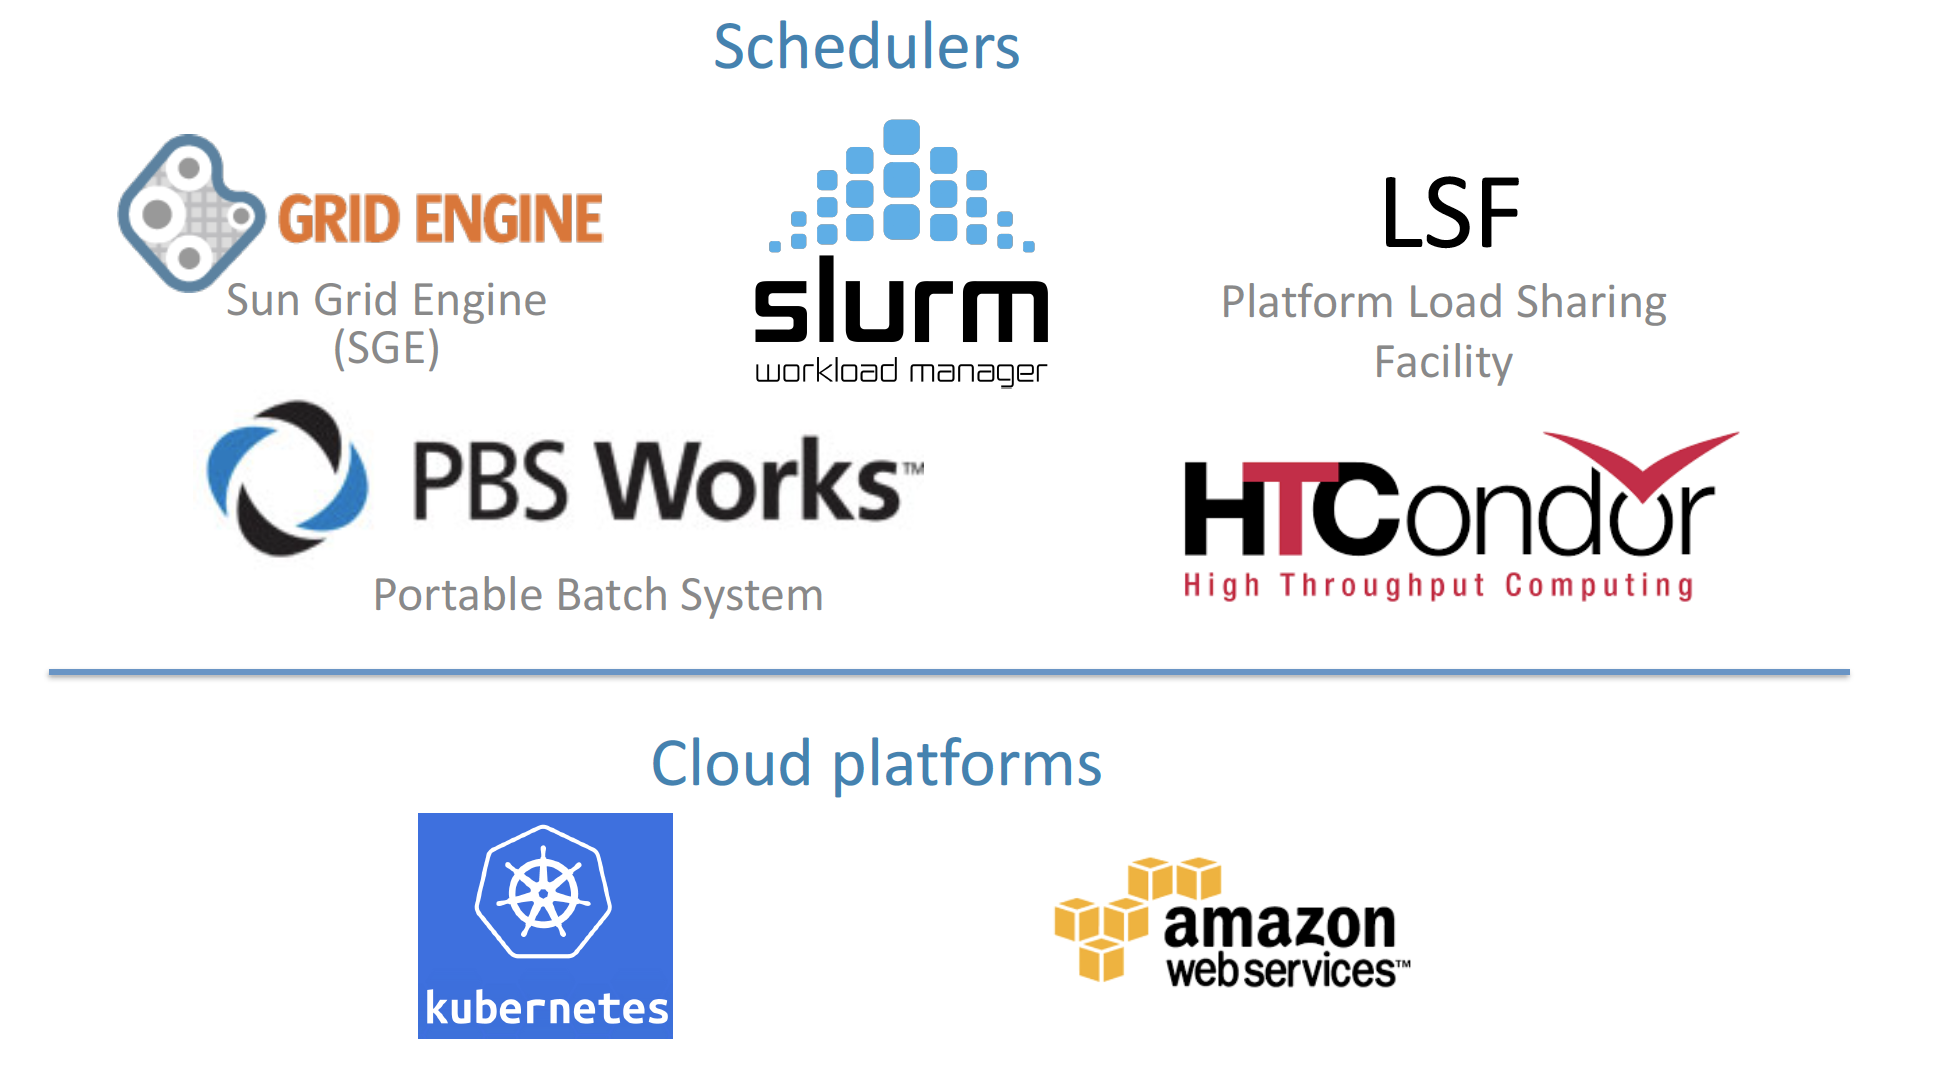
- Portable
Nextflow can be executed on multiple platforms without modifiying the code. It supports several schedulers such as SGE, LSF, SLURM, PBS and HTCondor and cloud platforms like Kubernetes, Amazon AWS and Google Cloud.
- Scalability
Nextflow is based on the dataflow programming model which simplifies writing complex pipelines. The tool takes care of parallelizing the processes without additional written code. The resulting applications are inherently parallel and can scale-up or scale-out, transparently, without having to adapt to a specific platform architecture.
- Resumable, thanks to continuous checkpoints
All the intermediate results produced during the pipeline execution are automatically tracked. For each process a temporary folder is created and is cached (or not) once resuming an execution.
Workflow structure
The workflows can be repesented as graphs where the nodes are the processes and the edges are the channels. The processes are block of code that can be executed such as scripts or programs, while the channels are asynchronous queue able to connect processess among them via input / output.
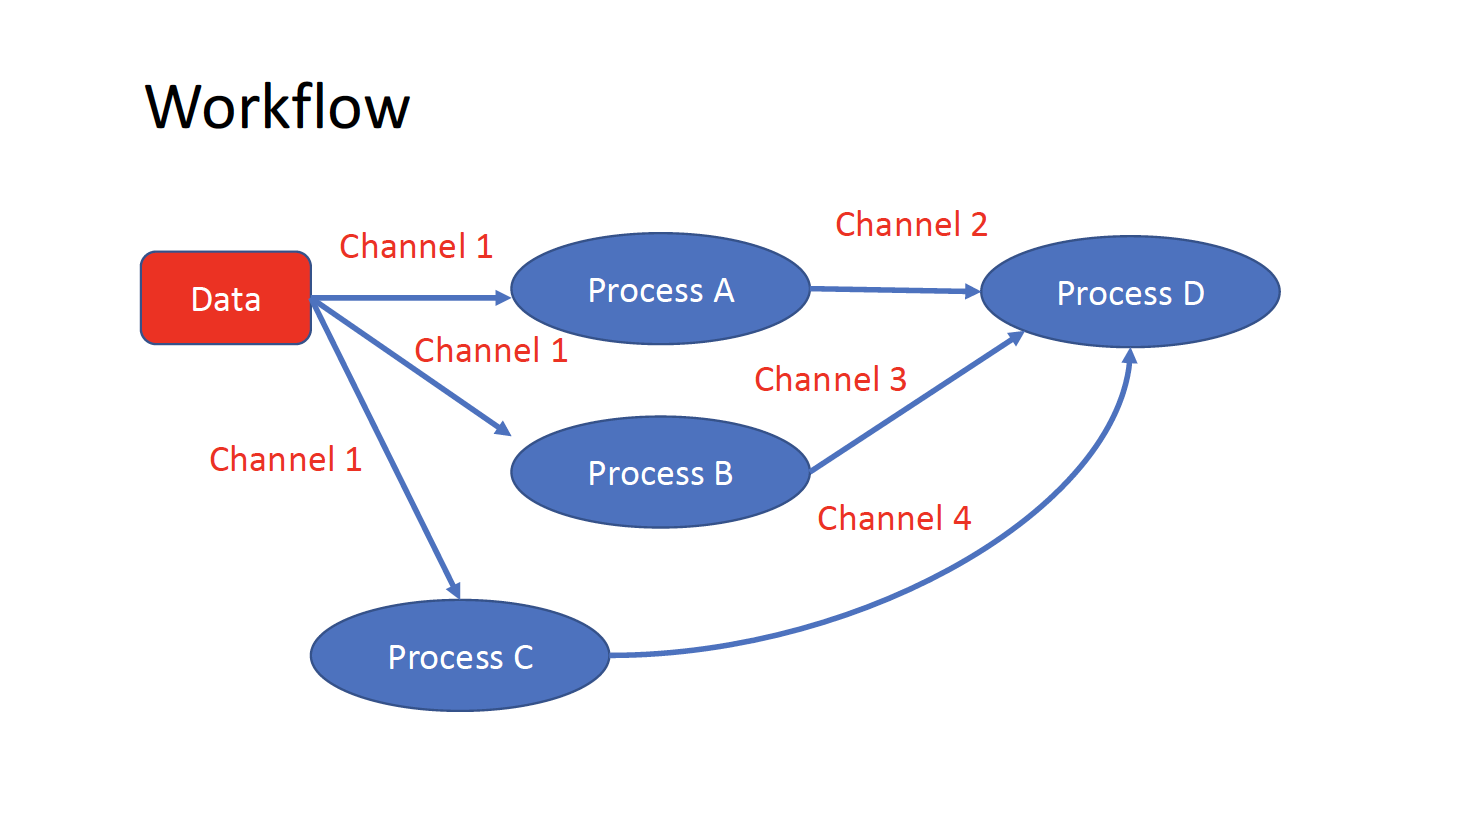
Each process is independent from the other and can be run in parallel depending on the number of elements in a channel. In the previous example the processes A, B and C can be run in parallel and only at their end the process D is triggered.
Installation
We need at least Java version 8.
java -version
Then we can install it by typing:
curl -s https://get.nextflow.io | bash
This will create an executable called nextflow that can be moved to /usr/local/bin or where we prefer. We can finally test using:
./nextflow run hello

N E X T F L O W  ~  version 20.07.1
Pulling nextflow-io/hello ...
downloaded from https://github.com/nextflow-io/hello.git
Launching `nextflow-io/hello` [peaceful_brahmagupta] - revision: 96eb04d6a4 [master]
executor >  local (4)
[d7/d053b5] process > sayHello (4) [100%] 4 of 4 ✔
Ciao world!

Bonjour world!

Hello world!

Hola world!
This command download from the a github repository and it runs the test script hello.
First scripts
Channels
We can make a very simple Nextflow script by writing this code in a file (test.nf):
#!/usr/bin/env nextflow

// This is a comment

/*
 * This is a block of comments
 */

// This is needed for activating the new DLS2
nextflow.enable.dsl=2


//Let's create a channel from string values

str = Channel.from('hello', 'hola', 'bonjour')

/*
* Let's print that channel using the operator view()
* https://www.nextflow.io/docs/latest/operator.html#view
*/
str.view()
Then to execute it you can just run:
$nextflow run test.nf
N E X T F L O W  ~  version 20.07.1
Launching `test.nf` [agitated_avogadro] - revision: 61a595c5bf
hello
hola
bonjour
As you can see the Channel is just a collection of values, but it can be also a collection of file paths. Let’s create three files:
touch aa.txt bb.txt cc.txt
And let’s create another script:
#!/usr/bin/env nextflow

nextflow.enable.dsl=2

/*
* Let's create the channel `my_files`
* using the method fromPath
*/

Channel
    .fromPath( "*.txt" )
    .set {my_fyles}

my_fyles.view()
nextflow run test2.nf
N E X T F L O W  ~  version 20.07.1
Launching `test2.nf` [condescending_hugle] - revision: f513c0fac3
/Users/lcozzuto/aaa/ELIXIR_containers_nextflow/aa.txt
/Users/lcozzuto/aaa/ELIXIR_containers_nextflow/bb.txt
/Users/lcozzuto/aaa/ELIXIR_containers_nextflow/cc.txt
Once executed we can see that a folder named work is generated. In that folder Nextflow will store the intermediate files generated by the processes.
EXCERCISE 1
Let’s create couple of files (like paired end reads) and let’s try to read it as they were a tuple.
See here https://www.nextflow.io/docs/latest/channel.html#fromfilepairs.
Here the solution: https://biocorecrg.github.io/ELIXIR_containers_nextflow/solution1.html
Processes
Let’s add now a process to our previous script test.nf:
#!/usr/bin/env nextflow

nextflow.enable.dsl=2

str = Channel.from('hello', 'hola', 'bonjour')

/*
 * Creates a process which receive an input channel containing values
 * Each value emitted by the channel triggers the execution
 * of the process. The process stdout is caputured and send over
 * the another channel.
 */

process printHello {

   tag { str_in } // this is for displaying the content of `str_in` in the log file

   input:
   val str_in

   output:
   stdout

   script:
   """
   echo ${str_in} in Italian is ciao
   """
}
The process can be seen as a function and is composed by:
- An input part where the input channels are defined
- An output part where we indicates what to store as a result that will be sent to other processes or published as final result
- A script part where we have the block of code to be executed with the data from the input channel and will produce the output for the ouput channel. You can run any kind of code / command line there, it is language agnostic. You can have some trouble with escaping some characters, in that case is better to wrap your code in a file and call it as a program.
Before the input you can indicate a tag that will be reported in the log. This is quite useful for logging / debugging.
Workflow
The code as it is will not produce anything, because you need another part that actually call the process and connect it to the input channel. This part is called a workflow. So let’s change our code:
#!/usr/bin/env nextflow

nextflow.enable.dsl=2

str = Channel.from('hello', 'hola', 'bonjour')

process printHello {

   tag { str_in }

   input:
   val str_in

   output:
   stdout

   script:
   """
   echo ${str_in} in Italian is ciao
   """
}

/*
 * A workflow consist of a number of invocations of processes
 * where they are fed with the expected input channels
 * as they were cutom functions. You can only invoke a process once per workflow.
 */

workflow {
 result = printHello(str)
 result.view()
}
We can run the script this time sending the execution in background and sending the log to a file.
nextflow run test.nf -bg > log.txt
Nextflow log
Let’s inspect now the log file:
cat log.txt
N E X T F L O W  ~  version 20.07.1
Launching `test.nf` [high_fermat] - revision: b129d66e57
[6a/2dfcaf] Submitted process > printHello (hola)
[24/a286da] Submitted process > printHello (hello)
[04/e733db] Submitted process > printHello (bonjour)
hola in Italian is ciao

hello in Italian is ciao

bonjour in Italian is ciao
The tag allows us to see that the process printHello was launched three times on hola, hello and bonjour values contained in the input channel. In each row there is a code before:
[6a/2dfcaf] Submitted process > printHello (hola)
This code indicates also the path in which is process is “isolated” and where you have the temporary files. Let’s have a look:
echo work/6a/2dfcaf*
work/6a/2dfcafc01350f475c60b2696047a87

ls -alht work/6a/2dfcaf*

ls -alht work/6a/2dfcaf*
total 40
-rw-r--r--  1 lcozzuto  staff     1B Oct  7 13:39 .exitcode
drwxr-xr-x  9 lcozzuto  staff   288B Oct  7 13:39 .
-rw-r--r--  1 lcozzuto  staff    24B Oct  7 13:39 .command.log
-rw-r--r--  1 lcozzuto  staff    24B Oct  7 13:39 .command.out
-rw-r--r--  1 lcozzuto  staff     0B Oct  7 13:39 .command.err
-rw-r--r--  1 lcozzuto  staff     0B Oct  7 13:39 .command.begin
-rw-r--r--  1 lcozzuto  staff    45B Oct  7 13:39 .command.sh
-rw-r--r--  1 lcozzuto  staff   2.5K Oct  7 13:39 .command.run
drwxr-xr-x  3 lcozzuto  staff    96B Oct  7 13:39 ..
You see a lot of “hidden” files:
- .exitcode, contains 0 if everything is ok, another value if there was a problem.
- .command.log, contains the log of the command execution. Often is identical to .command.out
- .command.out, contains the standard output of the command execution
- .command.err, contains the standard error of the command execution
- .command.begin, contains what has to be executed before .command.sh
- .command.sh, contains the block of code indicated in the process
- .command.run, contains the code made by nextflow for the execution of .command.sh and contains environmental variables, eventual invocations of linux containers etc.
For instance the content of .command.sh is:
cat work/6a/2dfcaf*/.command.sh
#!/bin/bash -ue
echo hola in Italian is ciao
And the content of .command.out is
cat work/6a/2dfcaf*/.command.out
hola in Italian is ciao
You can also name workflows as they were collections of processes. For instance we can write:
#!/usr/bin/env nextflow

nextflow.enable.dsl=2

str = Channel.from('hello', 'hola', 'bonjour')

process printHello {

   tag { str_in }

   input:
   val str_in

   output:
   stdout

   script:
   """
   echo ${str_in} in Italian is ciao
   """
}

/*
 * A workflow can be named as a function and receive an input using the take keyword
 */

workflow first_pipeline {
    take: str_input
    main:
    printHello(str_input).view()
}


/*
 * You can re-use the previous processes an combine as you prefer
 */

workflow second_pipeline {
    take: str_input
    main:
    printHello(str_input).collect().view()
}

/*
 * You can then invoke the different named workflows in this way
 * passing the same input channel `str` to both
 */

workflow {
    first_pipeline(str)
    second_pipeline(str)
}
You can see that with the previous code you can execute two workflows containing the same process. We add the collect operator to the second workflow that collects the output from different executions and return the resulting list as a sole emission.
Let’s run the code:
nextflow run test.nf -bg > log2

cat log2

cat log2
N E X T F L O W  ~  version 20.07.1
Launching `test.nf` [irreverent_davinci] - revision: 25a5511d1d
[de/105b97] Submitted process > first_pipeline:printHello (hello)
[ba/051c23] Submitted process > first_pipeline:printHello (bonjour)
[1f/9b41b2] Submitted process > second_pipeline:printHello (hello)
[8d/270d93] Submitted process > first_pipeline:printHello (hola)
[18/7b84c3] Submitted process > second_pipeline:printHello (hola)
hello in Italian is ciao

bonjour in Italian is ciao

[0f/f78baf] Submitted process > second_pipeline:printHello (bonjour)
hola in Italian is ciao

['hello in Italian is ciao\n', 'hola in Italian is ciao\n', 'bonjour in Italian is ciao\n']
EXCERCISE 2
Change the pipeline for producing files instead of standard output. You need to specify within the workflow what to output using emit keyword.
workflow pipeline {
    ...
    emit: output
}
Solution here: https://biocorecrg.github.io/ELIXIR_containers_nextflow/solution2.html
More complex scripts
#!/usr/bin/env nextflow

nextflow.enable.dsl=2

// this can be overridden by using --inputfile OTHERFILENAME
params.inputfile = "$baseDir/testdata/test.fa"

// the "file method" returns a file system object given a file path string
sequences_file = file(params.inputfile)

// check if the file exists
if( !sequences_file.exists() ) exit 1, "Missing genome file: ${genome_file}"


/*
 * Process 1 for splitting a fasta file in multiple files
 */

process splitSequences {

    input:
    path sequencesFile

    output:
    path ('seq_*')

    // simple awk command
    script:
    """
    awk '/^>/{f="seq_"++d} {print > f}' < ${sequencesFile}
    """
}


/*
 * Process 2 for reversing the sequences
 */

process reverseSequence {
    tag "$seq"
    publishDir "output"

    input:
    path seq

    output:
    path "all.rev"

	script:
    """
    cat ${seq} | awk '{if (\$1~">") {print \$0} else system("echo " \$0 " |rev")}' > all.rev
    """
}

workflow {
    splitted_seq	= splitSequences(sequences_file)

    // Here you have the output channel as a collection
    splitted_seq.view()

    // Here you have the same channel reshaped to send separately each value
    splitted_seq.flatten().view()

    // DLS2 allows you to reuse the channels! In past you had to create many identical
    // channels for sending the same kind of data to different processes

    rev_single_seq	= reverseSequence(splitted_seq)
}
Here we have two simple processes:
- the former splits the input fasta file in single sequences
- the latter is able to reverse the position of the sequences.
The input path is fed as a parameter using the script parameters *${seq}
params.inputfile
In this way this value can be overridden when calling the script in this way:
nextflow run test.nf --inputfile another_input.fa
The workflow part connects the two processes so that the output of the first process is fed to the second one.
During the execution Nextflow creates a number of temporary folders and this time will make also a soft link to the original input file. Then it will store output files locally.
The output file is then linked in other folders for being used as input from other processes. In this way there are no clashes and each process is nicely isolated from the others.
nextflow run test.nf -bg
N E X T F L O W  ~  version 20.07.1
Launching `test.nf` [sad_newton] - revision: 82e66714e4
[09/53e071] Submitted process > splitSequences
[/Users/lcozzuto/aaa/ELIXIR_containers_nextflow/nextflow/work/09/53e071d286ed66f4020869c8977b59/seq_1, /Users/lcozzuto/aaa/ELIXIR_containers_nextflow/nextflow/work/09/53e071d286ed66f4020869c8977b59/seq_2, /Users/lcozzuto/aaa/ELIXIR_containers_nextflow/nextflow/work/09/53e071d286ed66f4020869c8977b59/seq_3]
/Users/lcozzuto/aaa/ELIXIR_containers_nextflow/nextflow/work/09/53e071d286ed66f4020869c8977b59/seq_1
/Users/lcozzuto/aaa/ELIXIR_containers_nextflow/nextflow/work/09/53e071d286ed66f4020869c8977b59/seq_2
/Users/lcozzuto/aaa/ELIXIR_containers_nextflow/nextflow/work/09/53e071d286ed66f4020869c8977b59/seq_3
[fe/0a8640] Submitted process > reverseSequence ([seq_1, seq_2, seq_3])
if we inspect the content of work/09/53e071* generated by the process splitSequences
ls -l work/09/53e071*
total 24
-rw-r--r--  1 lcozzuto  staff  29 Oct  8 19:16 seq_1
-rw-r--r--  1 lcozzuto  staff  33 Oct  8 19:16 seq_2
-rw-r--r--  1 lcozzuto  staff  27 Oct  8 19:16 seq_3
lrwxr-xr-x  1 lcozzuto  staff  69 Oct  8 19:16 test.fa -> /Users/lcozzuto/aaa/ELIXIR_containers_nextflow/nextflow/testdata/test.fa
we have the file test.fa that is a soft link to the orinal input. And inspecting work/fe/0a8640* that is generated by the process reverseSequence reveals that the files generated by splitSequences are now linked as input.
ls -l work/fe/0a8640*
total 8
-rw-r--r--  1 lcozzuto  staff  89 Oct  8 19:16 all.rev
lrwxr-xr-x  1 lcozzuto  staff  97 Oct  8 19:16 seq_1 -> /Users/lcozzuto/aaa/ELIXIR_containers_nextflow/nextflow/work/09/53e071d286ed66f4020869c8977b59/seq_1
lrwxr-xr-x  1 lcozzuto  staff  97 Oct  8 19:16 seq_2 -> /Users/lcozzuto/aaa/ELIXIR_containers_nextflow/nextflow/work/09/53e071d286ed66f4020869c8977b59/seq_2
lrwxr-xr-x  1 lcozzuto  staff  97 Oct  8 19:16 seq_3 -> /Users/lcozzuto/aaa/ELIXIR_containers_nextflow/nextflow/work/09/53e071d286ed66f4020869c8977b59/seq_3
IMPORTANT: Nextflow will randomly generate temporary folders so they will be named differently in your execution!!!
At this point we can make two different workflows so that we show how the new DSL allows reusing of the code.
#!/usr/bin/env nextflow

nextflow.enable.dsl=2

// this can be overridden by using --inputfile OTHERFILENAME
params.inputfile = "$baseDir/testdata/test.fa"

// the "file method" returns a file system object given a file path string
sequences_file = file(params.inputfile)

// check if the file exists
if( !sequences_file.exists() ) exit 1, "Missing genome file: ${genome_file}"


/*
 * Process 1 for splitting a fasta file in multiple files
 */

process splitSequences {

    input:
    path sequencesFile

    output:
    path ('seq_*')

    // simple awk command

    script:
    """
    awk '/^>/{f="seq_"++d} {print > f}' < ${sequencesFile}
    """
}


/*
 * Process 2 for reversing the sequences
 */

process reverseSequence {
    tag "$seq"
    publishDir "output"

    input:
    path seq

    output:
    path "all.rev"

	script:
    """
    cat ${seq} | awk '{if (\$1~">") {print \$0} else system("echo " \$0 " |rev")}' > all.rev
    """
}

workflow flow1 {
    take: sequences
    main:
    splitted_seq        = splitSequences(sequences)
    rev_single_seq      = reverseSequence(splitted_seq)
}

workflow flow2 {
    take: sequences
    main:
    splitted_seq        = splitSequences(sequences).flatten()
    rev_single_seq      = reverseSequence(splitted_seq)

}

workflow {
   flow1(sequences_file)
   flow2(sequences_file)
}
The first workflow will just run like the previous script, while the second will “flatten” the output of the first process and will launch the second process on each single sequence.
The reverseSequence processes of the second workflow will run in parallel if you have enough processors or you are in a cluster environment with a scheduler supported by Nextflow.
nextflow run test.nf -bg
C02WX1XFHV2Q:nextflow lcozzuto$ N E X T F L O W  ~  version 20.07.1
Launching `test.nf` [insane_plateau] - revision: d33befe154
[bd/f4e9a6] Submitted process > flow1:splitSequences
[37/d790ab] Submitted process > flow2:splitSequences
[33/a6fc72] Submitted process > flow1:reverseSequence ([seq_1, seq_2, seq_3])
[87/54bfe8] Submitted process > flow2:reverseSequence (seq_2)
[45/86dd83] Submitted process > flow2:reverseSequence (seq_1)
[93/c7b1c6] Submitted process > flow2:reverseSequence (seq_3)
EXERCISE 3
Write the first workflow using pipes. Nextflow DLS2 allows you to use pipes for connecting channels via input / output. See documentation here:
https://www.nextflow.io/docs/latest/dsl2.html#pipes
Here the solution:
https://biocorecrg.github.io/ELIXIR_containers_nextflow/solution3.html
Resuming your pipeline
You can resume the execution after the code modification using the parameter -resume. Nextflow is smart enough to cache the execution since input and output were not changed.
nextflow run test.nf -bg -resume
N E X T F L O W  ~  version 20.07.1
Launching `test.nf` [determined_celsius] - revision: eaf5b4d673
[bd/f4e9a6] Cached process > flow1:splitSequences
[37/d790ab] Cached process > flow2:splitSequences
[93/c7b1c6] Cached process > flow2:reverseSequence (seq_3)
[45/86dd83] Cached process > flow2:reverseSequence (seq_1)
[87/54bfe8] Cached process > flow2:reverseSequence (seq_2)
[33/a6fc72] Cached process > flow1:reverseSequence ([seq_1, seq_2, seq_3])
/Users/lcozzuto/aaa/ELIXIR_containers_nextflow/nextflow/work/33/a6fc72786d042cacf733034d501691/all.rev
IMPORTANT: Nextflow parameters are with one hyphen (-resume) while pipeline parameters are with two (–inputfile)
Sometimes you might want to resume a previous run of your pipeline. For doing so you need to extract the job id of that run. You can do this by using the command nextflow log
nextflow log

TIMESTAMP          	DURATION	RUN NAME           	STATUS	REVISION ID	SESSION ID                          	COMMAND
2020-10-06 14:49:09	2s      	agitated_avogadro  	OK    	61a595c5bf 	4a7a8a4b-9bdb-4b15-9cc6-1b2cabe9a938	nextflow run test.nf
2020-10-08 19:14:38	2.8s    	sick_edison        	OK    	82e66714e4 	4fabb863-2038-47b4-bac0-19e71f93f284	nextflow run test.nf -bg
2020-10-08 19:16:03	3s      	sad_newton         	OK    	82e66714e4 	2d13e9f8-1ba6-422d-9087-5c6c9731a795	nextflow run test.nf -bg
2020-10-08 19:30:59	2.3s    	disturbed_wozniak  	OK    	d33befe154 	0a19b60d-d5fe-4a26-9e01-7a63d0a1d300	nextflow run test.nf -bg
2020-10-08 19:35:52	2.5s    	insane_plateau     	OK    	d33befe154 	b359f32c-254f-4271-95bb-6a91b281dc6d	nextflow run test.nf -bg
2020-10-08 19:56:30	2.8s    	determined_celsius 	OK    	eaf5b4d673 	b359f32c-254f-4271-95bb-6a91b281dc6d	nextflow run test.nf -bg -resume
You can then resume the state of your execution using the SESSION ID in this way:
nextflow run -resume 0a19b60d-d5fe-4a26-9e01-7a63d0a1d300 test.nf
Nextflow’s cache can be disabled for a specific process adding setting the directive cache to false. You can also choose three caching methods:
cache = true // (default) Cache keys are created indexing input files meta-data information (name, size and last update timestamp attributes).
cache = 'deep' // Cache keys are created indexing input files content.
cache = 'lenient' // (Best in HPC and shared file systems) Cache keys are created indexing input files path and size attributes
IMPORTANT On some shared file systems you might have inconsistent files timestamps. So cache lenient prevent you from unwanted restarting of cached processes.
Decoupling resources, parameters and nextflow script
When you make a complex pipelines you might want to keep separated the definition of resources needed, the default parameters and the main script. You can achieve this by two additional files:
- nextflow.config
- params.config
The nextflow.config file allows to indicate the resources needed for each class of processes. You can label your processes to make a link with the definitions in the nextflow.config file. This is an example of a nextflow.config file:
includeConfig "$baseDir/params.config"

process {
     memory='1G'
     cpus='1'
     time='6h'

     withLabel: 'onecpu'
   	{
		memory='1G'
   	 	cpus='1'
	}

}

process.container = 'biocorecrg/c4lwg-2018:latest'
singularity.cacheDir = "$baseDir/singularity"
The first row indicates to use the information stored in the params.config file (described later). Then we have the definition of the default resources for a process:
process {
     memory='1G'
     cpus='1'
     time='6h'
...
Then we have the resources needed for a class of processes in particular labeled with twocpus
     withLabel: 'twocpus'
   	{
		memory='2G'
   	 	cpus='2'
	}
If we have a look at the process fastQC within the test2.nf file, we can see the use of the label.
/*
 * Process 1. Run FastQC on raw data.
 */
process fastQC {
    publishDir fastqcOutputFolder
    tag { reads }
    label 'twocpus'

    input:
    path reads
...
The latest two rows of the config file indicates which container needs to be used. In this case, it assumes has to be pulled from DockerHub. In case you want to use singularity you can indicate where to store the local image by using the singularity.cacheDir setting
process.container = 'biocorecrg/c4lwg-2018:latest'
singularity.cacheDir = "$baseDir/singularity"
Let’s now launch the script test2.nf
cd test2;
nextflow run test2.nf

N E X T F L O W  ~  version 20.07.1
Launching `test2.nf` [distracted_edison] - revision: e3a80b15a2
BIOCORE@CRG - N F TESTPIPE  ~  version 1.0
=============================================
reads                           : /Users/lcozzuto/aaa/ELIXIR_containers_nextflow/nextflow/test2/../testdata/*.fastq.gz
executor >  local (2)
[df/2c45f2] process > fastQC (B7_input_s_chr19.fastq.gz) [  0%] 0 of 2
[-        ] process > multiQC                            -
Error executing process > 'fastQC (B7_H3K4me1_s_chr19.fastq.gz)'

Caused by:
  Process `fastQC (B7_H3K4me1_s_chr19.fastq.gz)` terminated with an error exit status (127)

Command executed:

  fastqc B7_H3K4me1_s_chr19.fastq.gz

Command exit status:
  127

executor >  local (2)
[df/2c45f2] process > fastQC (B7_input_s_chr19.fastq.gz) [100%] 2 of 2, failed: 2 ✘
[-        ] process > multiQC                            -
Error executing process > 'fastQC (B7_H3K4me1_s_chr19.fastq.gz)'

Caused by:
  Process `fastQC (B7_H3K4me1_s_chr19.fastq.gz)` terminated with an error exit status (127)

Command executed:

  fastqc B7_H3K4me1_s_chr19.fastq.gz

Command exit status:
  127

Command output:
  (empty)

Command error:
  .command.sh: line 2: fastqc: command not found

Work dir:
  /Users/lcozzuto/aaa/ELIXIR_containers_nextflow/nextflow/test2/work/c5/18e76b2e6ffd64aac2b52e69bedef3

Tip: when you have fixed the problem you can continue the execution adding the option `-resume` to the run command line
We will get a number of errors since no executable is found in our environment / path. This because they are stored in our docker image! So we can launch it this time with the -with-docker parameter.
nextflow run test2.nf -with-docker

nextflow run test2.nf -with-docker
N E X T F L O W  ~  version 20.07.1
Launching `test2.nf` [boring_hamilton] - revision: e3a80b15a2
BIOCORE@CRG - N F TESTPIPE  ~  version 1.0
=============================================
reads                           : /Users/lcozzuto/aaa/ELIXIR_containers_nextflow/nextflow/test2/../testdata/*.fastq.gz
executor >  local (3)
[22/b437be] process > fastQC (B7_H3K4me1_s_chr19.fastq.gz) [100%] 2 of 2 ✔
[1a/cfe63b] process > multiQC                              [  0%] 0 of 1
executor >  local (3)
[22/b437be] process > fastQC (B7_H3K4me1_s_chr19.fastq.gz) [100%] 2 of 2 ✔
[1a/cfe63b] process > multiQC                              [100%] 1 of 1 ✔
This time it worked beautifully since Nextflow used the image indicated within the nextflow.config file that contains our executables.
Now we can have a look at the params.config file
params {
	reads		= "$baseDir/../testdata/*.fastq.gz"
	email		= "myemail@google.com"
}
As you can see we indicates the pipeline parameters that can be overridden by using –reads and –email. This is not mandatory but I found quite useful to modify this file instead of using very long command lines with tons of –something.
Publishing final results
After running the script you see two new folders named ouptut_fastqc and ouptut_fastqc that contain the result of the pipeline. We can indicate which process and which output can be considered the final output of the pipeline by using the publishDir directive that has to be specified at the beginning of a process.
In our pipeline we define these folders here:
/*
 * Defining the output folders.
 */
fastqcOutputFolder    = "ouptut_fastqc"
multiqcOutputFolder   = "ouptut_multiQC"


[...]

/*
 * Process 1. Run FastQC on raw data. A process is the element for executing scripts / programs etc.
 */
process fastQC {
    publishDir fastqcOutputFolder  			// where (and whether) to publish the results

[...]

/*
 * Process 2. Run multiQC on fastQC results
 */
process multiQC {
    publishDir multiqcOutputFolder, mode: 'copy' 	// this time do not link but copy the output file
You can see that the default mode to publish the results in Nextflow is soft linking. You can change this behaviour by specifying the mode as indicated in the multiQC process.
IMPORTANT: You can also “move” the results but this is not suggested for files that will be needed for other processes. This will likely disrupt your pipeline.
Adding a help section for the whole pipeline
In this example we also describe another good practice: the use of the –help parameter. At the beginning of the pipeline we can write:
params.help             = false    // this prevents a warning of undefined parameter

// this prints the input parameters
log.info """
BIOCORE@CRG - N F TESTPIPE  ~  version ${version}
=============================================
reads                           : ${params.reads}
"""

// this prints the help in case you use --help parameter in the command line and it stops the pipeline
if (params.help) {
    log.info 'This is the Biocore\'s NF test pipeline'
    log.info 'Enjoy!'
    log.info '\n'
    exit 1
}
so launching the pipeline with –help will show you just the parameters and the help.
nextflow run test2.nf --help
N E X T F L O W  ~  version 20.07.1
Launching `test2.nf` [mad_elion] - revision: e3a80b15a2
BIOCORE@CRG - N F TESTPIPE  ~  version 1.0
=============================================
reads                           : /Users/lcozzuto/aaa/ELIXIR_containers_nextflow/nextflow/test2/../testdata/*.fastq.gz
This is the Biocore's NF test pipeline
Enjoy!
Using Singularity
We recommend to use Singularity instead of docker in HPC environments. This can be done by just using the Nextflow parameter -with-singularity and without touching the code. Nextflow will take care of pulling, converting and storing the image for you. This will be done just once and then nextflow will use the stored image for further executions.
nextflow run test2.nf -with-singularity
...

ls singularity/
biocorecrg-c4lwg-2018-latest.img
Adding more steps
We can make pipelines incrementally by adding more and more processes. Nextflow will take care of the dependencies between the input / output and of the parallelization. Within the test3 folder we have two more steps: the reference indexing and the read alignments with bowtie (http://bowtie-bio.sourceforge.net/index.shtml).
So we add a new input for the reference sequence:
log.info """
BIOCORE@CRG - N F TESTPIPE  ~  version ${version}
=============================================
reads                           : ${params.reads}
reference                       : ${params.reference}
"""

reference = file(params.reference)
We generate in this way a singleton channel called reference which content is never consumed and can be indefinitely used.
We add two more processes. The first one is for the indexing of the reference:
/*
 * Process 2. Bowtie index
 */
process bowtieIdx {
    tag { ref }

    input:
    path ref

    output:
    tuple val("${ref}"), path ("${ref}*.ebwt")

    script:
    """
        gunzip -c ${ref} > reference.fa
        bowtie-build reference.fa ${ref}
        rm reference.fa
    """
}
Since bowtie indexing requires unzipped reference we unzip it then we build the reference and remove the unzipped file afterwards. The output channel generated is organized as a tuple, i.e. a list of elements. The first element of the list is the name of the index as a value, the second is a list of files constituting the index. The former is needed for building the command line of the alignment step, the latter are the files needed for the alignment.
The second process is the alignment step:
/*
 * Process 3. Bowtie alignment
 */
process bowtieAln {
    publishDir alnOutputFolder, pattern: '*.sam'

    tag { reads }
    label 'twocpus'

    input:
    tuple val(refname), path (ref_files)
    path reads

    output:
    path "${reads}.sam", emit: samples_sam
    path "${reads}.log", emit: samples_log

    script:
    """
    bowtie -p ${task.cpus} ${refname} -q ${reads} -S > ${reads}.sam 2> ${reads}.log
    """
}
As you see there are two different input channels: the index one and the reads. The index name specified by refname is used for building the command line while the index files, indicated by ref_files, are just linked in the current directory by using the path qualifier.
We also produced two kind of outputs: the alignments and the logs. The first one is the one we want to keep as a final result. So we specify this using the publishDir pattern parameter.
publishDir alnOutputFolder, pattern: '*.sam'
The second one will be just passed to the next process for being used by the multiQC process. To distinghuish among them we can assign them different names.
 output:
    path "${reads}.sam", emit: samples_sam
    path "${reads}.log", emit: samples_log
This section will allow us to connect these outputs directly with other processes when we call them in the workflow section:
workflow {
	fastqc_out = fastQC(reads)
	bowtie_index = bowtieIdx(reference)
	bowtieAln(bowtie_index, reads)
	multiQC(fastqc_out.mix(bowtieAln.out.samples_log).collect())
}
So we passed the samples_log output to the multiqc process after mixing it with the output channel from the fastqc process.
Modules and re-usage of the code
A great advance of the new DLS2 is to allow the modularization of the code. In particular you can move a named workflow within a module and keep it apart for being accessed from different pipelines. Looking at the test4 folder will give you an idea of what is the code using modules.
#!/usr/bin/env nextflow

nextflow.enable.dsl=2

/*
 * Input parameters: read pairs
 * Params are stored in the params.config file
 */

version                 = "1.0"
params.help             = false

// this prints the input parameters
log.info """
BIOCORE@CRG - N F TESTPIPE  ~  version ${version}
=============================================
reads                           : ${params.reads}
"""

if (params.help) {
    log.info 'This is the Biocore\'s NF test pipeline'
    log.info 'Enjoy!'
    log.info '\n'
    exit 1
}

/*
 * Defining the output folders.
 */
fastqcOutputFolder    = "ouptut_fastqc"
multiqcOutputFolder   = "ouptut_multiQC"


Channel
    .fromPath( params.reads )
    .ifEmpty { error "Cannot find any reads matching: ${params.reads}" }
    .set {reads_for_fastqc}


/*
 * Here we include two modules from two files. We also add the parameter OUTPUT to pass them the folders where to publish the results
 */
include { FASTQC } from "${baseDir}/lib/fastqc" addParams(OUTPUT: fastqcOutputFolder)
include { MULTIQC } from "${baseDir}/lib/multiqc" addParams(OUTPUT: multiqcOutputFolder)

// The main worflow can directly call the named workflows from the modules
workflow {
	fastqc_out = FASTQC(reads_for_fastqc)
	MULTIQC(fastqc_out.collect())
}


workflow.onComplete {
	println ( workflow.success ? "\nDone! Open the following report in your browser --> ${multiqcOutputFolder}/multiqc_report.html\n" : "Oops .. something went wrong" )
}
We now include two modules named fastqc and multiqc from ${baseDir}/lib/fastqc.nf and ${baseDir}/lib/multiqc.nf.
Let’s inspect the fastqc module:
/*
*  fastqc module
*/

params.CONTAINER = "quay.io/biocontainers/fastqc:0.11.9--0"
params.OUTPUT = "fastqc_output"

process qc {
    publishDir(params.OUTPUT, mode: 'copy')
    tag { reads }
    container params.CONTAINER

    input:
    path(reads)

    output:
    path("*_fastqc*")

    script:
    """
	fastqc ${reads}
    """
}


workflow FASTQC {
    take:
    input

    main:
		out =  qc(input)
    emit:
    	out
}
So we have the named workflow FASTQC that take an input and just launch the process qc on that input. Finally it emits the output defined in the process qc.
The process qc is quite simple: it contains the directive publishDir, the tag, the container to be used and has similar input, output and script session we saw previously.
A module can contain its own parameters that can be used for connecting the main script to some variables inside the module. in this example we have the declaration of two parameters that are defined at the beginning:
params.CONTAINER = "quay.io/biocontainers/fastqc:0.11.9--0"
params.OUTPUT = "fastqc_output"
They can be overridden from the main script that is calling the module.
- The parameter params.OUTPUT can be used for connecting the definition of the output of this module with the one in the main script.
- The parameter params.CONTAINER instead for deciding which image has to be used for this particular module.
In this example in our main script we pass only the OUTPUT parameters by writing in this way:
include { FASTQC } from "${baseDir}/lib/fastqc" addParams(OUTPUT: fastqcOutputFolder)
include { MULTIQC } from "${baseDir}/lib/multiqc" addParams(OUTPUT: multiqcOutputFolder)
While we keep the information of the container inside the module for better reproducibility:
params.CONTAINER = = "quay.io/biocontainers/fastqc:0.11.9--0"
Here you see that we are not using own our image but using directly one provided by biocontainers. Here you can find a list of fastqc images developed and stored by the biocontainers community https://biocontainers.pro/#/tools/fastqc.
Let’s have a look now at the multiqc.nf module:
/*
*  multiqc module
*/

params.CONTAINER = "quay.io/biocontainers/multiqc:1.9--pyh9f0ad1d_0"
params.OUTPUT = "multiqc_output"
params.LABEL = ""

process qc {
    publishDir(params.OUTPUT, mode: 'copy')
    container params.CONTAINER
    label (params.LABEL)

    input:
    path (inputfiles)

    output:
    path "multiqc_report.html"

    script:
    """
    multiqc .
    """
}

workflow MULTIQC {
    take:
    input

    main:
		out =  qc(input)
    emit:
    	out
}
So it is very similar to the fastqc one, we just add an extra parameter for connecting the resources defined in the nextflow.config file and the label indicated in the qc process.
In case we want to use it we would need to change the main code in this way:
include { MULTIQC } from "${baseDir}/lib/multiqc" addParams(OUTPUT: multiqcOutputFolder, LABEL="onecpu")
This because we specified the label onecpu in out nextflow.config file:
includeConfig "$baseDir/params.config"

process {
     container = 'biocorecrg/debian-perlbrew-pyenv3-java'
     memory='1G'
     cpus='1'
     time='6h'

     withLabel: 'onecpu'
   	{
		memory='1G'
   	 	cpus='1'
	}

}

singularity.cacheDir = "$baseDir/singularity"
IMPORTANT: you will need to specify a default image when you want to run nextflow -with-docker or -with-singularity and you have containers defined inside the modules
EXERCISE: Try to make a module wrapper of the bowtie tool and change the script accordingly as the test3.
Solution in the folder test5
Reporting and graphical interface
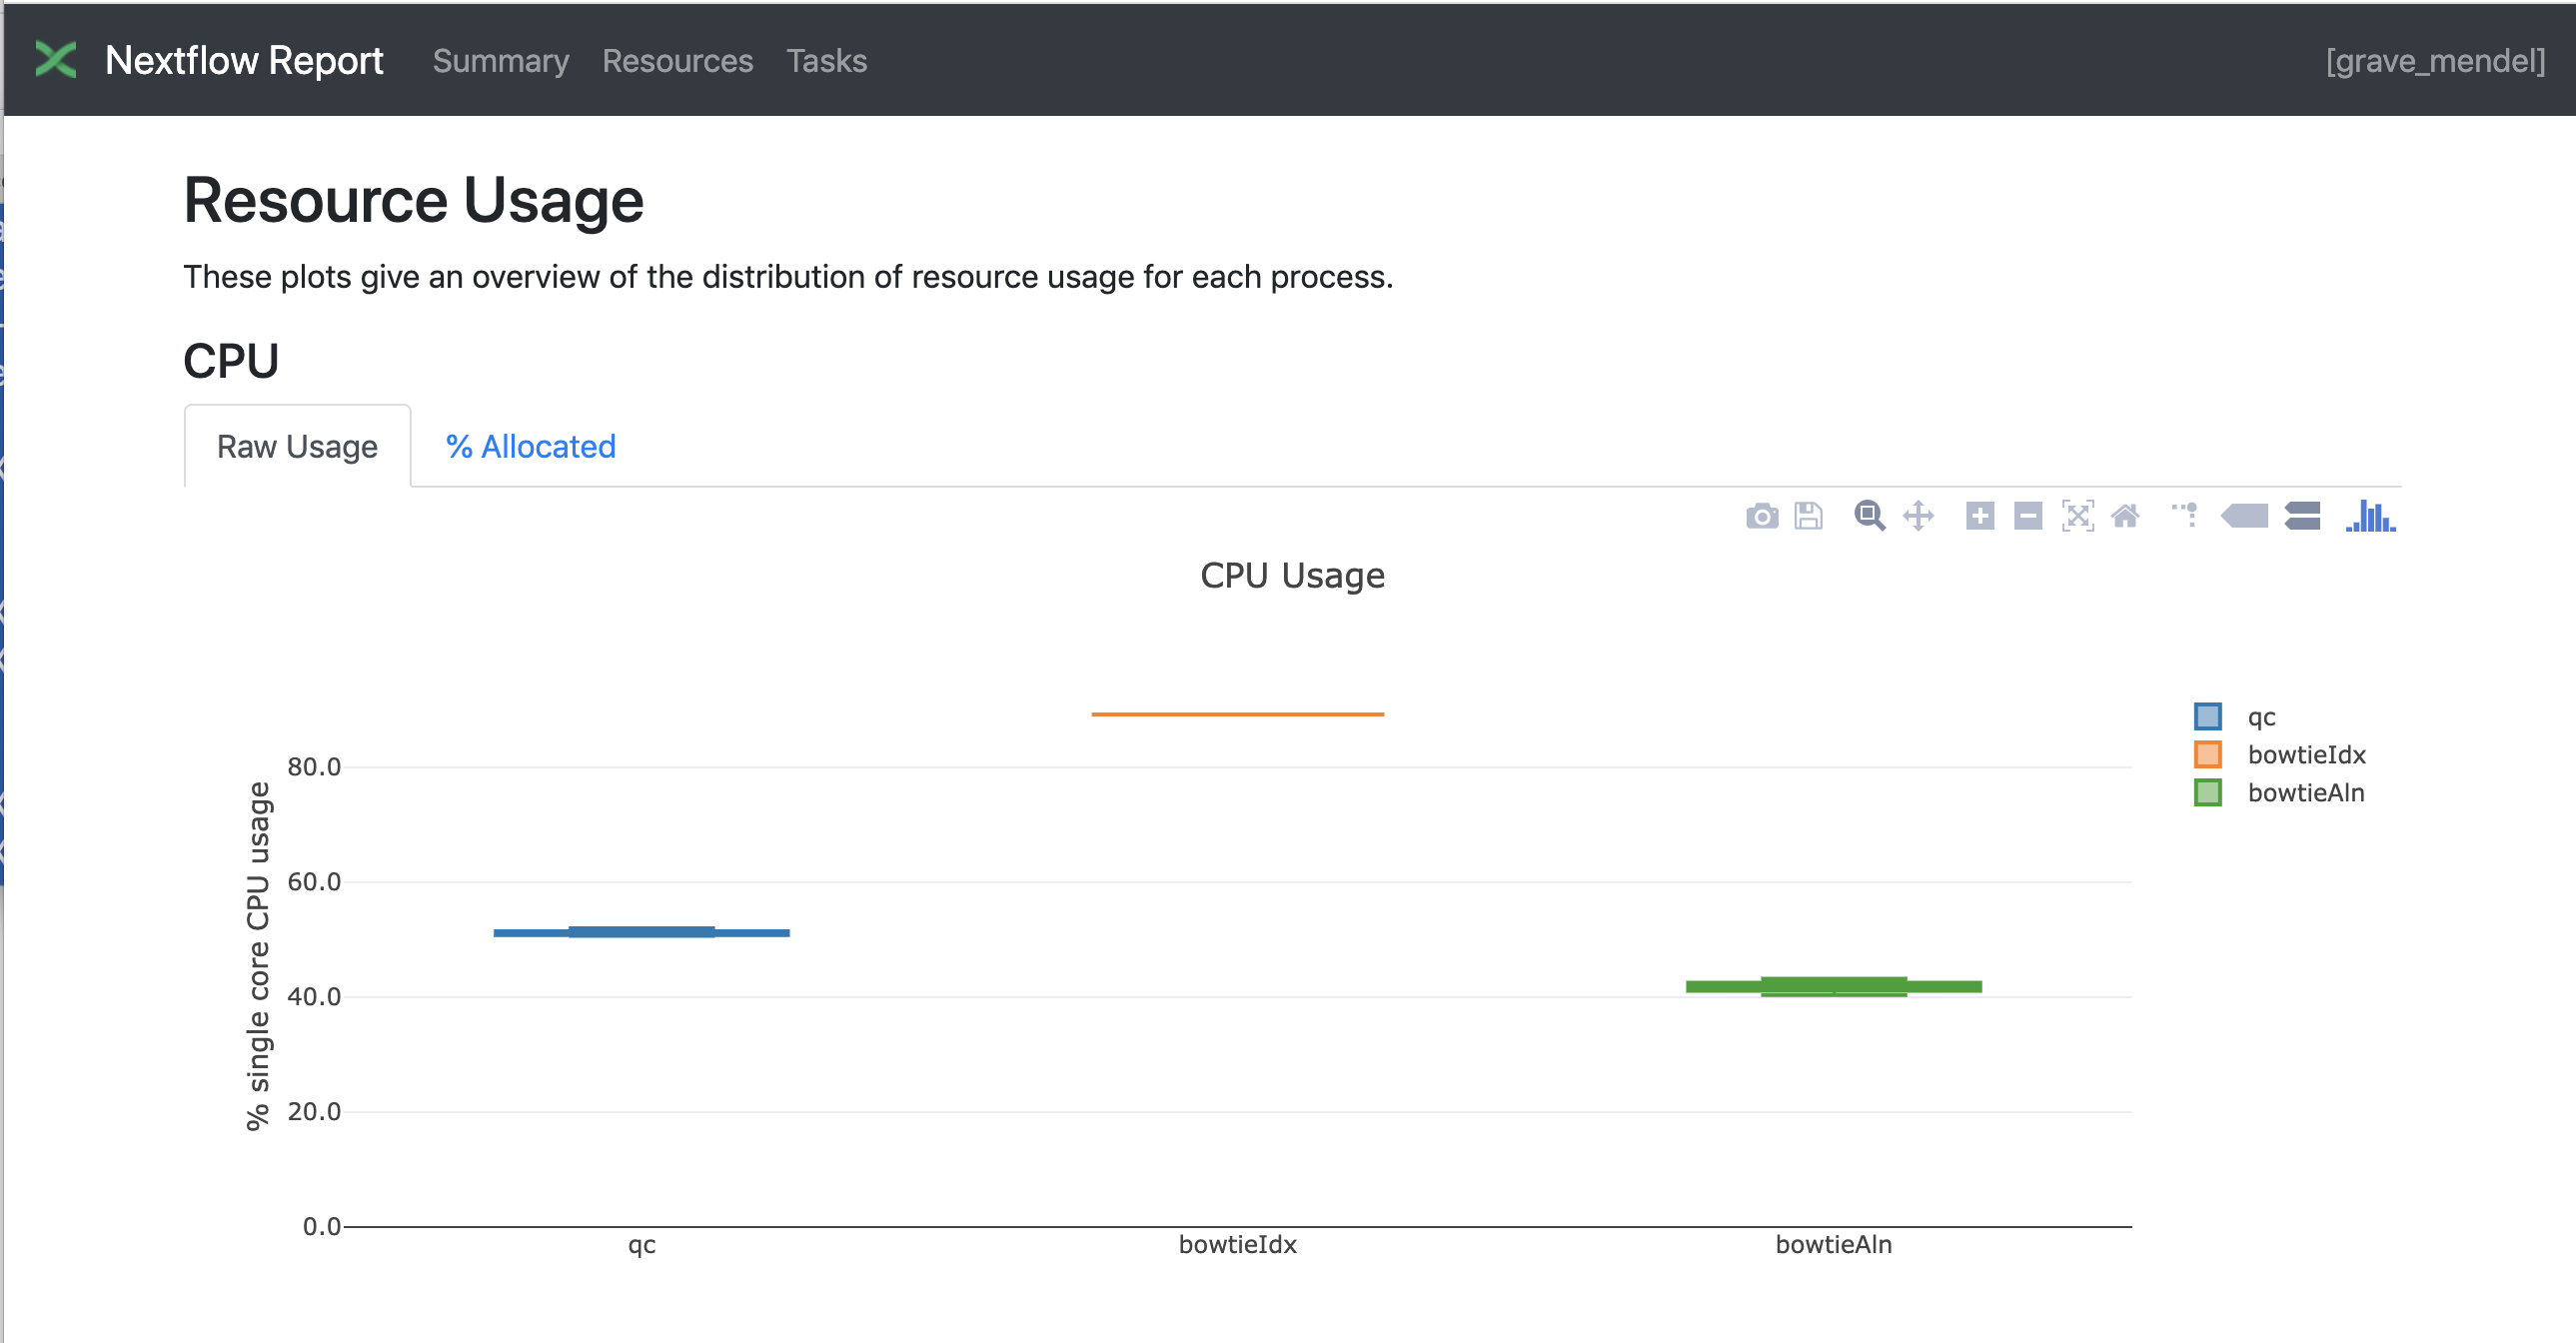
Nextflow has an embedded function for reporting a number of informations about the resources needed by each job and the timing. Just adding a parameter will give you a nice html report.
nextflow run test5.nf -with-docker -bg -with-report > log
Nextflow Tower is an open source monitoring and managing platform for Nextflow workflows. There are two versions:
- Open source for monitoring of single pipelines
- Commercial one for workflow management, monitoring and resource optimisation.
We will show the open source one.
First of all you need to access the tower.nf website and doing the login using one of the methods.

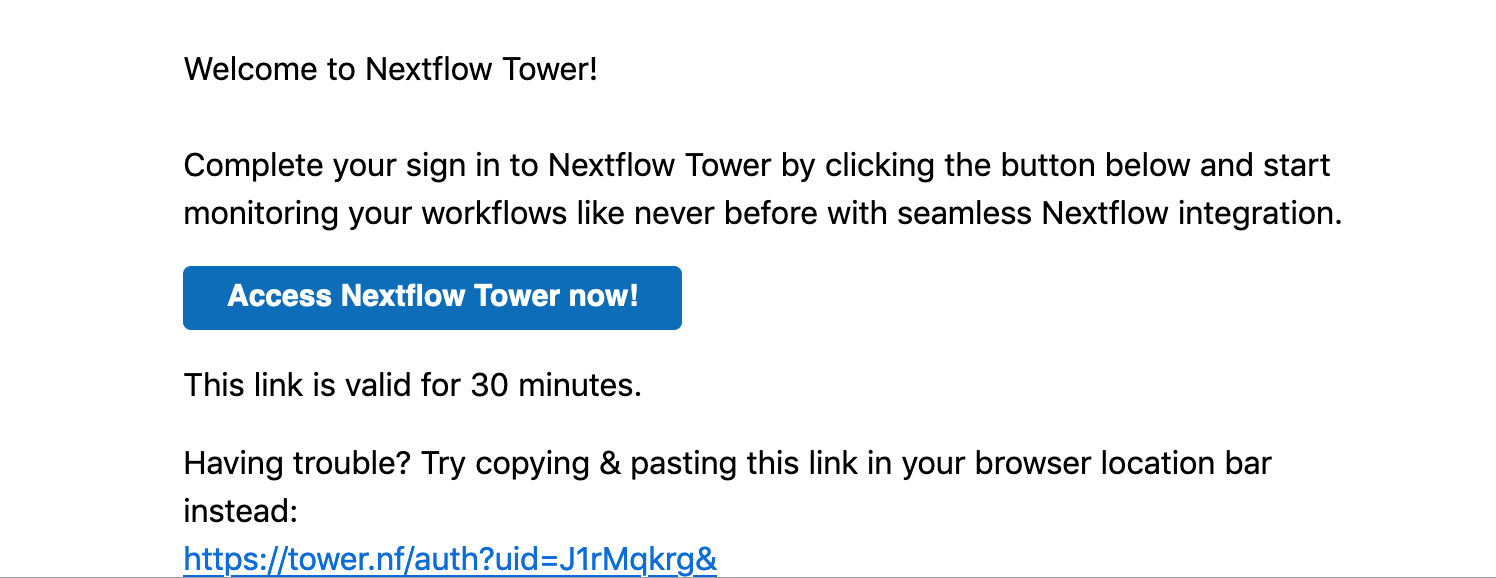
We select the email for receiving the instructions and the token to be used for the pipeline.

So we check the email:
We then follow the instructions exporting two environmental variables:
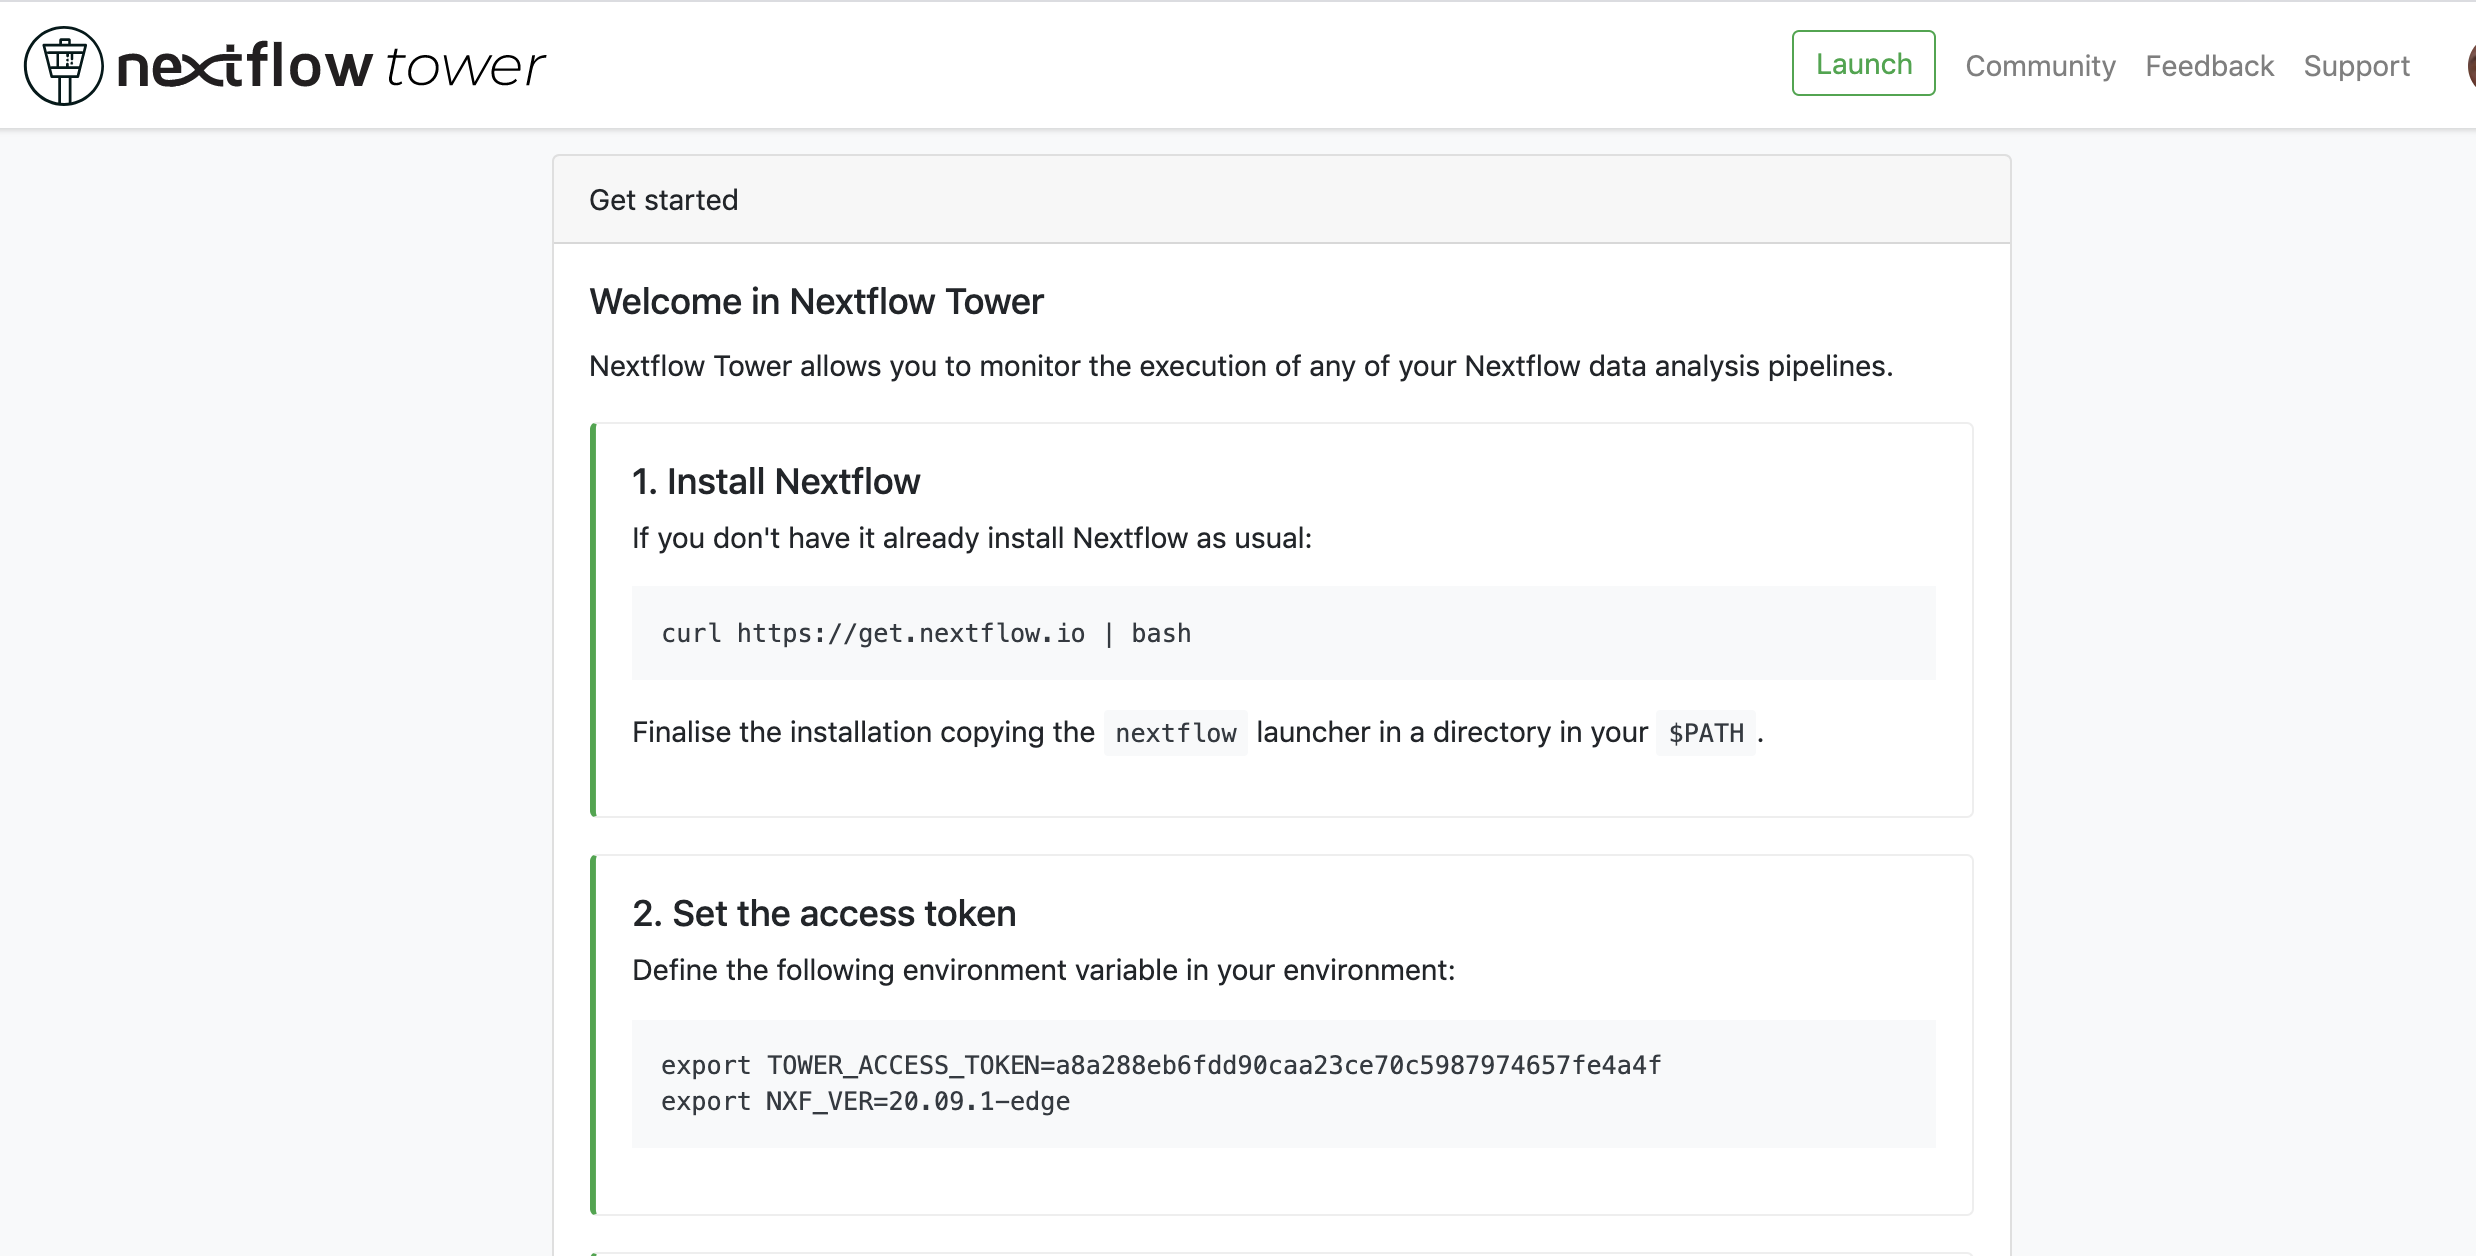
export TOWER_ACCESS_TOKEN=*******YOUR***TOKEN*****HERE*******
export NXF_VER=20.09.1-edge
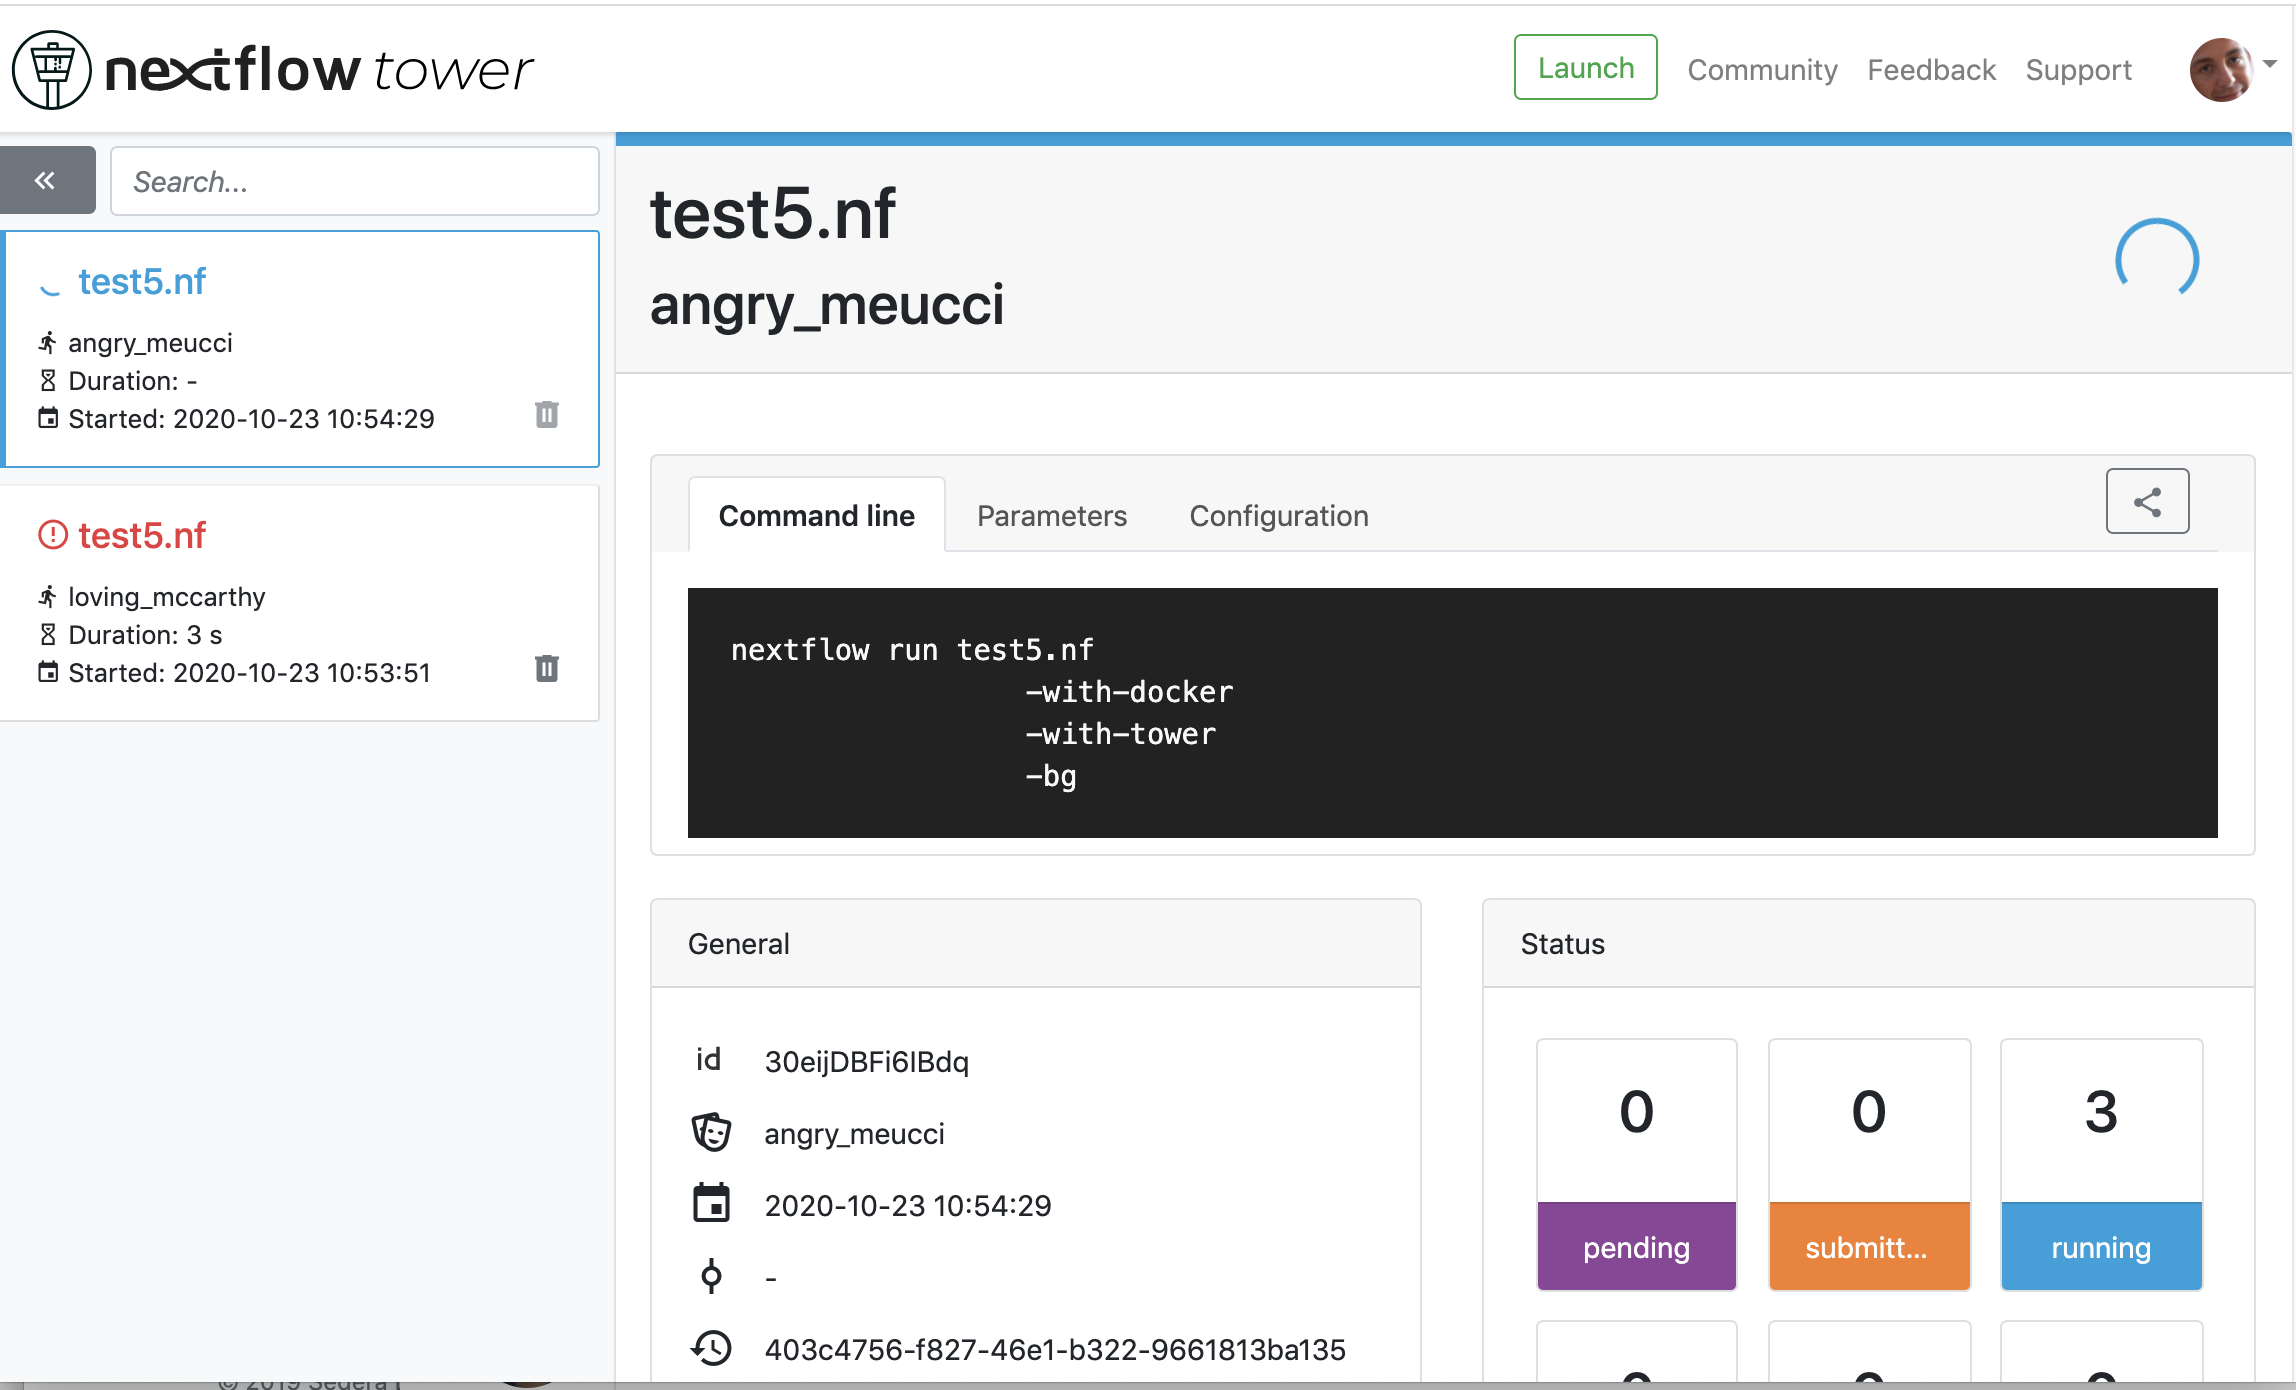
we then launch the pipeline:
nextflow run test5.nf -with-singularity -with-tower -bg > log


CAPSULE: Downloading dependency io.nextflow:nf-tower:jar:20.09.1-edge
CAPSULE: Downloading dependency org.codehaus.groovy:groovy-nio:jar:3.0.5
CAPSULE: Downloading dependency io.nextflow:nextflow:jar:20.09.1-edge
CAPSULE: Downloading dependency io.nextflow:nf-httpfs:jar:20.09.1-edge
CAPSULE: Downloading dependency org.codehaus.groovy:groovy-json:jar:3.0.5
CAPSULE: Downloading dependency org.codehaus.groovy:groovy:jar:3.0.5
CAPSULE: Downloading dependency io.nextflow:nf-amazon:jar:20.09.1-edge
CAPSULE: Downloading dependency org.codehaus.groovy:groovy-templates:jar:3.0.5
CAPSULE: Downloading dependency org.codehaus.groovy:groovy-xml:jar:3.0.5
We finally go to the tower website again:
| Previous page | Home | Next page |